Quantcast
Channel: The Media Center Blog
Viewing all 108 articles
Browse latest View live

Another look at TunerFree MCE

$
0
0

TunerFree MCE is a great Windows Media Center add-in for UK and US IP TV. Native Media Center is sorely lacking IP TV Content and TunerFree MCE has long been one of the best ways of adding online TV like BBC iPlayer, ITV Player, 4OD and Channel 5 content, plus Hulu for US users. An updated version of the TunerFree MCE user interface has been out for a while now, but I wanted to take another look and perhaps if your not currently using this free add-in you might want to check it out. Of course donations are welcome and once a donation has been made you will receive a license to remove the start-up messages.

image

The new TunerFree MCE user interface is very slick and much like Media Center itself with the up / down left / right pivot menus.

BBC

image

ITV

image

Channel 4

image

Channel 5

image

Favourites – Will automatically track and add in the TV Shows you have been watching the most. Online favourites are produced by all users of Tuner Free and what people are watching the most.

image

Search – You can easily search for the TV Show you are looking for.

image

Search for top gear

image

Settings – There are various settings you can configure I wont cover them now, the Update now option allows you to manually force an update which will update TV Show content, however TunerFree MCE should automatically update itself periodically in the background as well.

image

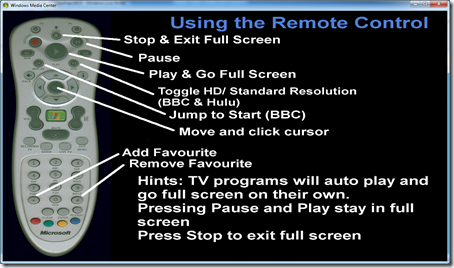
Help displays the remote control functions.

image

You can play the Live TV Channels which are all Flash based as well as all the catch-up TV shows. In the case of the BBC channels allot of the catch-up programs are WMV streams which means the video plays natively in Media Center and Media Center Extenders, with all the regular transport controls etc.

Some of the BBC shows are Flash based however for example BBC HD. How TunerFree MCE handles content that is Flash based is to launch the TV Show on the Channels webpage. The webpage is embedded within Media Center

image

BBC One Live (Flash) – If your HTPC has regular screen resolutions like 720p and 1080p the TunerFree MCE program has some auto mouse moves that will start the flash video playing and then make it go full screen. This works most of the time, but some times I need to use a mouse if things don’t quite work as expected. The Logitech TouchMouse iOS app is quite handy for controlling the mouse on the HTPC via my iPOD Touch.

image

BBC Two Programs

image

If you select a TV show you then see a nicely designed page with the TV show background image and each episode is listed for playback. Each episode has its own image and short synopsis.

image

BBC Radio is also available for streaming

image

My children like watching the CBBC and Cbeebies channels on their Linksys DMA extender and small wall mounted HDTV in their bedroom.

Overall I really like the new user interface and its a good improvement over previous versions of TunerFree MCE. With Microsoft neglecting Media Center development and media content in favour of the XBOX 360 dashboard, its great that Milliesoft are able to give use an excellent add-in for Windows Media Center and IP TV.

You can download TunerFree MCE here and please don’t forget to make a donation if you find the software useful.


Arcsoft TotalMedia Theatre version 5.2.1.119 released

$
0
0

If you are an Arcsoft TotalMedia Theatre user, there is a new version that has been released yesterday. Version 5.2.1.119 adds some new features and bug fixes:

NEW FEATURES
01. Automatic Refresh Rate Switching
02. Intel IvyBridge Support
03. AVCHD 3D content support
04. New authentication system (allows converting trial downloads into full version.)

BUG FIXES
01. Fix pixelation issue with recent Fox Blu-ray discs (Star Wars, X-Men First Class, etc)
02. Fix YouTube
03. Fix OpenCL for SimHD on AMD hardware
04. Fix playback issue with Grindhouse Blu-ray
05. Fix stutter issue on AMD 5xxx series cards
06. Fix AV sync over time issue with some Blu-ray 3D discs (Pirates 4, etc)

KNOWN ISSUES
01. Apocolypse Now disc playback fails pre-menu.

There is also a new authentication engine and new Activation Code to convert it from a Trial version to a Full version.

Full details can be seen here

How to install & fix Macrotube for MCE

$
0
0

A quick write up on Macrotube which adds YouTube, YouTube HD, Daily Motion and MSN Soapbox videos and more into Windows Media Center.

image

Go to this page download either the 32bit or 64bit installer file, run it and install the add-in.

image

Now YouTube will NOT work out of the box and we want to add YouTube HD content as well. You need to update and replace a couple of XML files to get it to work.

Example of Youtube not working:

image

Go to this page and download the two XML files to a temp folder. Now renamed the files as shown below:

YouTubeHD_20110830.xml –> YouTubeHD.xml

YouTube _20110827.xml –> YouTube.xml

Now move your renamed XML files in to the following folder:

C:\ProgramData\Jasmio\MacroTube\Providers

When you open Macrotube again you see now that YouTube HD has also been added

image

The YouTube videos will now play as expected.

image

Tip: I find that selecting Relevance rather than Date on the pivot menu will yield better search results.

image

Fanless Sandybridge iTX HTPC

$
0
0

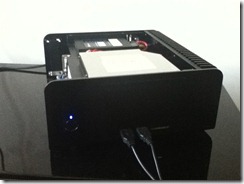
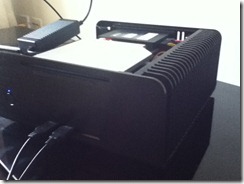
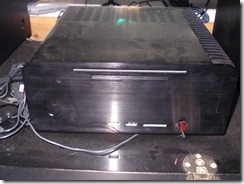
I built a new iTX HTPC a while ago now but I thought I’d share my build on the blog. The HTPC is based around the Tranquil PC bare bones ixLS chassis and motherboard.

Components List:

  • Tranquil PC bare bones ixLS chassis
  • Intel DH67CF(B3) iTX motherboard
  • 4GB DDR3 RAM chip
  • Intel i3 2125 CPU
  • Sony BC-5600S Blu-ray Slim slot drive
  • Corsair Force Series 3 60GB Sata3 6Gbs Solid State Drive (Operating System)
  • Western Digital WD20EARX 2TB Caviar Green SATA3 6Gbs 3.5” Hard Drive (Data)
  • 120Watt 12Volt 10Amp External Power Supply brick

Software List:

  • Windows 7 Ultimate 64 bit
  • My Movies 4.02
  • Arcsoft Total Media Theatre 5
  • Slysoft AnyDVD HD
  • Shark 007 Codec Pack V3.1.6
Product Description

Bringing beauty, power, efficiency and reliability to your desktop. Designed from the ground up, to provide a reliable and fan less cooling system for the power user, the ixLS Power PC can process any application with ease.

The ixLS PC, often used as the basis of the ultimate media centre, or an exclusive desktop PC - build yours to your own specification with this bare bones kit.

High definition video, complex 3D rendering, or just writing a letter - just do it. Fit your choice of 2nd Generation Intel Core Processor - any version delivers stunning performance.

Initially I had big problems with Windows 7 blue screening allot and there was no real indication as to why? There were no memory dump files being created by Windows and the error message on the actual blue screen wasn’t helping. I first thought it was a heat problem? This being my first totally passively cooled rig I naturally thought it was heat related, but after contacting Tranquil PC support and going over the heat temps shown in the Bios and in the Intel hardware monitor program, it seemed it was not over heating at all.

I then eventually figured out that the problem was with the Corsair Solid State drive and I found on their forums many other users having the same problems. I found a firmware update for the SSD and since I updated the drive it has not blue screened ever again.

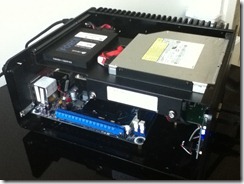
The Tranquil PC chassis is beautifully made and my HTPC is totally silent which is a big improvement over my old Micro ATX ATI/AMD based HTPC which had several fans in side of it. Silence really is bliss.

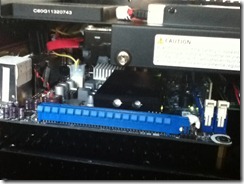
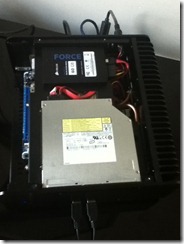
IMG_1100IMG_1101IMG_1102IMG_1103IMG_1104DSCN0120DSCN0121

The system is very fast it boots from shutdown and launches Windows Media Center in less than 10 seconds and it resumes from S3 Sleep mode instantly. The Solid State drive really does make everything feel much snappier. Its not the cheapest HTPC you can build but the quality does really shine through. I just wish I had one in every room in my home! Blu-ray’s play seamlessly in Windows Media Center / Arcsoft TotalMedia Theatre. The Blu-ray optical drive is the only thing that makes any noise if I play a disc, however with the Blu-ray discs ripped to the Home Server and streamed over the local network the Blu-ray optical drive is not used and so silent.

376 (2)

One thing I don’t like is Tranquil PC do not supply in the price of the barebones package an internal IR receiver. As this was a demo unit Tranquil were good enough to throw in a free IR receiver. However they do not use the proper CIR Receivers for these Intel Media motherboards. But instead the supplied IR receiver connects to an internal USB header and not to the dedicated CIR (Consumer Infrared Receiver) header.

I do have one problem with the IR receiver that is installed at the moment and that is the Windows Media Center discrete Power On/Off commands in the Logitech Harmony software do not seem to work 100% with the HTPC. I think I will buy one of these CIR’s off eBay and see if that works better?

image

Overall I am happy with my new HTPC, its certainly the nicest one I have personally owned in my own home! Although I have built many nice top end HTPC’s for clients.

www.phaze1digital.com

No Netflix in Media Center? Depressed? Try MCE LoveFilm instead!

$
0
0

The big news this week was that Netflix have finally launched an online streaming service here in the UK. I have been waiting for this for a long time and naively assumed because Netflix in is Windows Media Center for users in the US that we would also get access to the official Microsoft/Netflix add-in. However I discovered this week that Netflix users in Canada and Brazil never got the Netflix add-in for Windows Media Center. So I am now not holding out much hope we will ever see it.

I will only cancel my LoveFilm subscription and change to Netflix if I can use it in Windows Media Center. There might be a way to fool the system and change the locale of the PC to US and get the Netflix add-in but then the problem is how to change the locale back to UK for Live TV and guide data etc but retain the Netflix add-in? I did previously have Netflix working in Media Center when I lived in Thailand and used a VPN connection but I didn’t have Live TV configured in Media Center then so it didn’t matter if the PC’s locale remained set as US. There is a thread on The Green Button here about Netflix in Media Center and possible UK usage.

I’ve emailed the WECH MVP email group at Microsoft and asked the question and also posted on the Netflix forums here but so far no response and I am not holding my breath.

So now I am depressed and thinking of options, I could use the Netflix app on the Nintendo Wii that is sat in the living room. I could use the Netflix app on the XBOX 360 but I would have to purchase an XBOX Live Gold subscription and as I don’t play games online I haven’t got one. LoveFilm is also available on the XBOX 360 and requires Gold. I don’t have a Sony Playstation 3. Roku are launching UK boxes with Netflix but that’s another box, I’d rather just do it all on the HTPC. Obviously I could add an icon in to Windows Media Center to launch Netflix externally in a web browser but its not ideal.

Or maybe I can stick with LoveFilm and not give Netflix my money! My current LoveFilm subscription is for discs only and I’ve been getting Blu-rays in the post, they have countered Netflix’s UK launch and now have a new £4.99 package for unlimited online streaming only no discs but I am thinking of switching to this package.

I’ve contacted LoveFilm a few times in the past and they have no plans of doing an official Windows Media Center add-in either, shame on you Love Film! But Milliesoft have written a 3rd party LoveFilm add-in for Media Center called MCE LoveFilm.

image

It looks the part the UI is beautiful but there are some draw backs. As LoveFilm is flash based its the old webpage embedded in to Media Center affair which can be tricky if the auto mouse moves don’t start and full screen the video you are trying to play. Also due to some limitation developers have working with the LoveFilm SDK/API there is no easy way of telling which movies are available for online streaming? You have to click in to each movie individually and get to its details page to see if there is a Play button present of not. So you end up clicking in to loads of movies that you then find are simply not available to Play and only available to rent (Disc in the post) which is frustrating to say the least.

Maybe Milliesoft could add some sort of overlay icon on the movie covers if a Play button is available for that title? That would help improve things somewhat. Ideally I’d like to be able to filter on all titles that are available for streaming in to one view and any titles that can only be rented are excluded from the view.

I believe Martin Millmore is currently working on a fix as it seems LoveFilm have recently changed the layouts of their pages and when I tried it the other day I was unable to get any videos to play.

Also the free version of MCE LoveFilm is limited to only display 25 titles You can compare the free and premium features here. The full version is £9.99 per HTPC which if it works I think I would buy it. I will let you know as soon as Martin has a new version available and the issue is fixed so please wait until I update this post before you install it.

How to use an E.ON TV PowerDown plug with a Logitech Harmony Remote Control

$
0
0

If you want to kill the standby power consumption of the TV’s in your home then using an E.ON TV PowerDown plug is one way to do it.

FREE E.ON TV PowerDown

They are free to E.ON Energy customers and you can purchase them from their online shop for only 3 quid each. They are very easy to setup with your TV’s original remote control and the setup instructions can be found here, they are however not so easy to setup for use in conjunction with a Logitech Harmony universal remote control.

Some blurb from their website:

“Eliminating standby use in our homes is not always easy. That little red light on your television and home entertainment additions such as surround sound amplifiers, DVD Players and games consoles are needlessly costing you money every hour.
Our TV PowerDown automatically switches these TV peripherals on and off when you turn your TV on and off. It learns to recognise the signal from your television remote control. This enables it to activate your television automatically into standby mode whenever you are ready to use it. And when you have finished using your television you switch it off in the normal way using your remote control and the TV PowerDown does the rest!”

Basically you plug in your TV in to the master socket on the E.ON TV PowerDown plug and then use the slave socket to plug in any peripherals such as a DVD player or what ever, I am not using the peripheral socket however as my HDTV’s are wall mounted so just plugging in the TV to the master socket. When your TV goes in to standby mode the E.ON TV PowerDown plug detects this and then totally kills the power to the TV and peripherals if you have any connected so you have now eliminated standby power consumption. I recommend you don’t use this with DVR’s like Windows Media Center , Sky + and Virgin Media boxes they need to be left in standby so they can wake up and record stuff!

Now the first time I tried to set one of these up with my Harmony I couldn’t get it working and eventually gave up. However I had another go yesterday and I now have it working! What I did was to add the E.ON TV PowerDown plug in to the Logitech Harmony database as a new device. Ideally to follow this guide you will need two Harmony remotes capable of learning IR commands (If you only have one remote don’t panic) and also you will need an old remote control you are not using for anything or another remote control from another room in the house.

1. The first thing you need to do is obviously plug your TV in to the master socket on the E.ON TV PowerDown plug and then plug the E.ON plug in to the mains socket on the wall and position the IR sensor thingy.

2. The next thing you need to do is program the E.ON plug with a remote control command which will turn it on and therefore TV standby will be resumed from the totally off power state. This is where you need your old remote control from any device that you are not using or grab a remote control that is from a different room in the house. I was setting up this E.ON plug for the TV in my lounge, I couldn’t find an old unused remote so I used the remote from my Cambridge Audio amp in the bedroom. You can pick any button off the remote to teach to the E.ON plug I used the eject button on my Cambridge amp remote, but it could be any button. Follow the instructions here to teach the E.ON plug the remote control button command. Once you have done this and when pressing the button you chose on the remote turns on the E.ON plug OK then you can move to the next step.

3. Login to your Logitech Harmony software, go to the device tab and click the Add Device button

image

From the drop down list select Home Automation –> Home Appliance

image

Now I could not see a manufacturer called E.ON in the list so I just selected Not Listed

image

Enter E.ON in to the text box and click Save

image

For the model enter TVA106EON then click the Next button

image

Click Next again

image

Select No you do not have a remote and click Next

image

It will then say it can’t find your device in the database, click Next.

image

For now just select There are no power buttons…….

image

On this page select Done

image

Our new device is then listed with the others as Home Appliance, click the Settings button

image

Select rename this device and click the Next button

Rename the device E.ON TV PowerDown and click the Save button.

image

4. Now we need to teach the E.ON TV PowerDown device / your Harmony remote control the button command from your other remote you used in step 2.

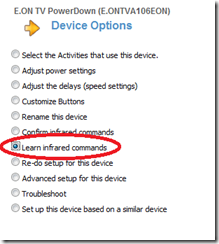
Select Learn IR Commands then click the Next button.

image

Scroll down and tick PowerOn then click the Learn button.

image

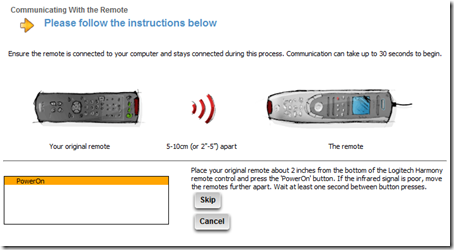
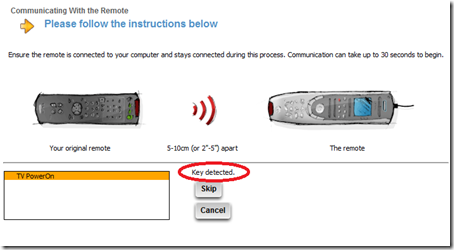
Connect the Harmony remote for the room to your PC via the USB cable, grab your other remote that use used to teach the E.ON plug in step 2 and press the same button again and teach the Harmony that particular button command. In my case it was the eject button on my Cambridge amp remote.

image

It should then say Key Detected and return you to the page with all the IR commands listed on it, click the Done button.

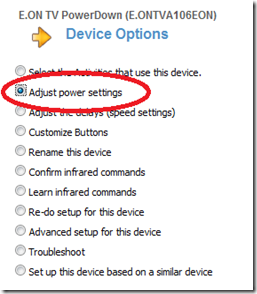
5. Now select Adjust power settings and click the Next button

image

Select I want to turn off this device when it’s not in use

image

Select One button on the remote for turning it both On and Off

image

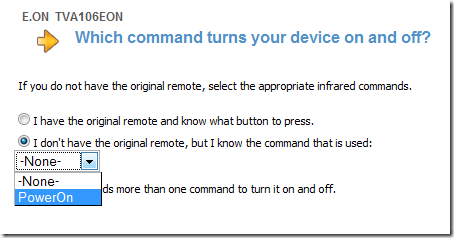
Select I don’t have the original remote, but I know the command that is used:

Select PowerOn and then click the Next button and then Done button

image

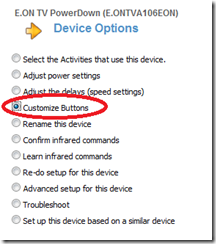
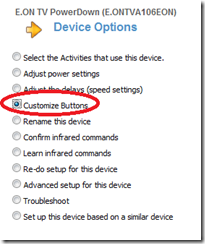
6. If your Harmony has an LCD screen you may want to make sure a custom button will be shown. Select Customize Buttons and click Next.

image

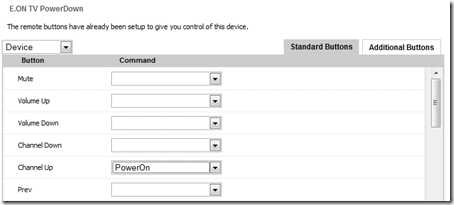
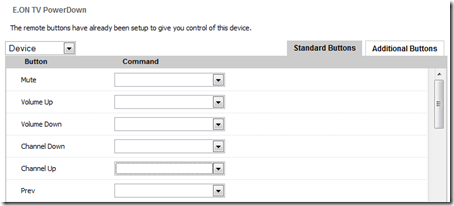
For some reason it set the Channel Up hard button to the PowerOn command? Just blank this out

image

image

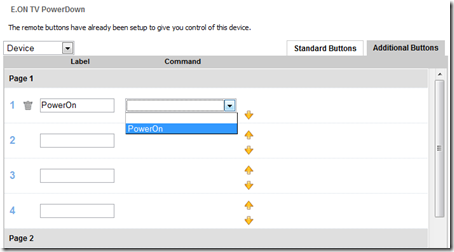
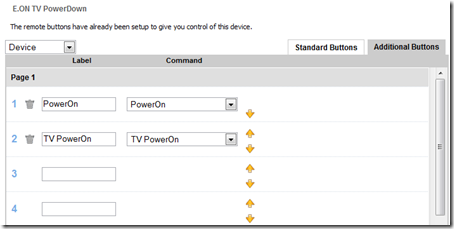
Click the Additional Buttons tab, on page 1 slot 1 type the name PowerOn and select the PowerOn command from the drop down menu, then click the Done button.

image

Update your Harmony remote now to add the new E.ON device to the remote control.

Now at this point as a test I added the E.ON TV PowerDown device in to my Watch TV activity. However I found that when I started the activity the command to turn on the E.ON plug was sent OK but my TV was not being powered on. So this meant the TV went back in to standby mode from the totally powered off state but then did not come out of standby mode and actually turn on. I couldn’t figure out why this was happening so to get round this problem I needed to teach the E.ON TV PowerDown device in the Harmony software the actual PowerOn command of my TV. So it would sent two commands one to turn on the E.ON plug and one to then turn on the TV out of standby.

Now you could use your TV’s original remote control to do this but its likely that you only have a Power Toggle button on that remote (One button that turns on and off the TV). So if you have two Logitech Harmony remotes that can learn IR it is probably better to do what I did, so I could learn the discrete PowerOn command for the TV. If you don’t have two Harmony’s you will just have to use the PowerToggle button on your TV’s original remote control.

Harmony remote control #1 is the remote we have just been programming for the lounge.

Harmony remote control #2 is another Harmony from my bedroom.

As I don’t have the same TV in each room what I did was temporarily add the TV in my lounge an LG 42LE4500 to the Harmony #2 controller from the bedroom and updated the remote.

I could then teach the Harmony #1 / E.ON device with the discrete PowerOn command of the TV in the lounge, from the Harmony #2 remote. Confused?

7. Teach the E.ON TV PowerDown device the discrete PowerOn command of your TV.

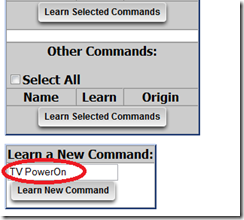
Select Learn IR on the E.ON TV PowerDown device scroll down to the bottom of the page and enter “TV PowerOn” in the Learn a New Command section.

Click the Learn New Command button

image

Ensure you connect the Harmony #1 remote to your PC via USB.

Then using the Harmony #2 remote with the temporarily added TV2 device press the PowerOn button from the LCD screen to teach the Harmony #1 remote the command.

image

Click the Done button.

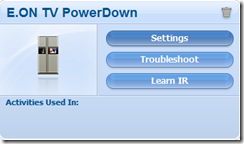
On the Devices tab, click the Settings button on the E.ON TV PowerDown device

image

Select Customize Buttons and click Next

image

Click the Additional Buttons tab, you can see I now have two buttons / commands on the E.ON TV PowerDown device. PowerOn to power on the E.ON plug and TV PowerOn to power on the TV from standby. Click Done.

image

If you update the Harmony #1 remote again now you will be able to manually test if both of these commands work? Ensure your TV is currently in the totally powered off state i.e. the standby light is out. Then on the Harmony remote click the devices button, select the E.ON TV PowerDown device, press the PowerOn button from the LCD screen and the TV should go in to standby. Then press the TV PowerOn button and the TV should then turn on.

8. Adding the E.ON TV PowerDown device in to your activities.

Now we have added the E.ON TV PowerDown device to our remote and both our power on commands are working you just need to add in the E.ON TV PowerDown device to your activities that use the TV.

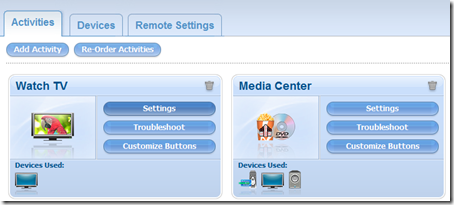
Go to the Activities tab and select Settings on your first activity that requires the TV.

image

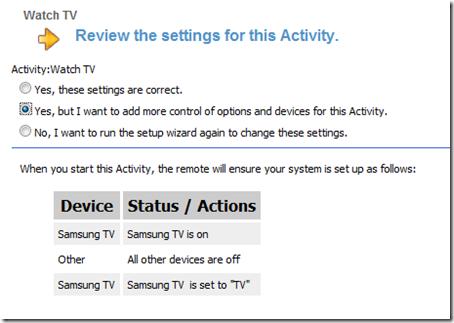
Select Review the settings for this activity

image

Select Yes, but I want to add more control of options and devices for this activity

image

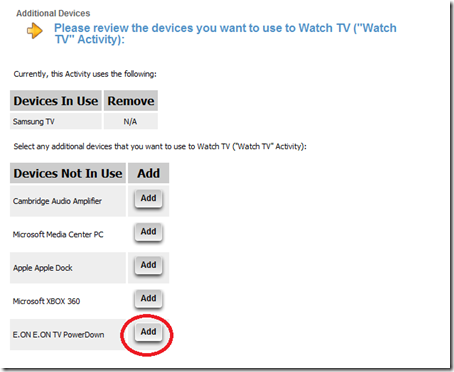
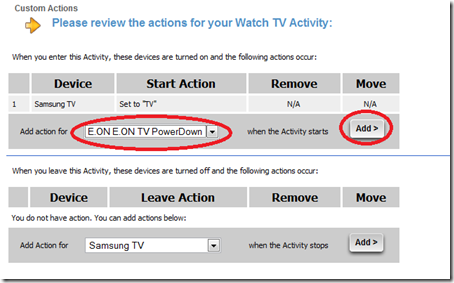
Now Add the E.ON TV PowerDown device in to the activity, then click Save.

image

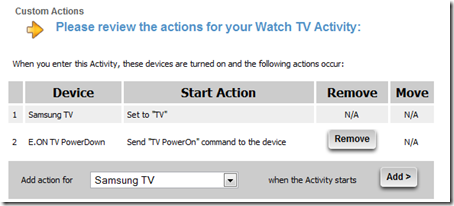
Run through the rest of the wizard clicking next and leaving the settings as you had them. On the page shown below you need to insert an extra TV PowerOn command for the E.ON TV PowerDown device.

image

Select – Send this IR command: TV PowerOn

image

This is a pretty basic Watch TV activity, however if you have lots of commands going on in your activity you should use the up arrows to move the E.ON TV PowerDown – TV PowerOn command to the top of the list.

image

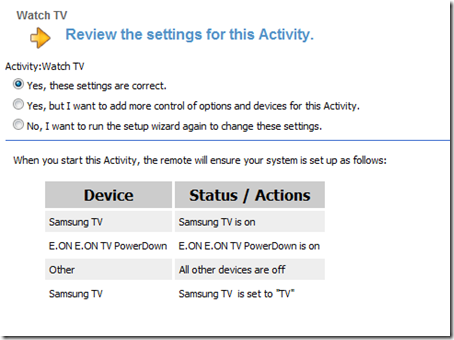
Click Save at the end and then select Yes these settings are correct, click Next and Done.

image

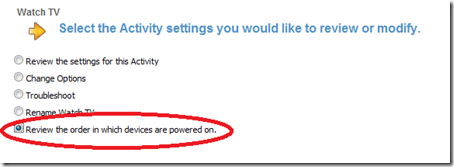
Select Review the order in which devices are powered on, click Next.

image

Select the E.ON TV PowerDown device and click the up arrow to move it to the first device to be powered on.

image

Click Done

image

Repeat this process for all your activities that require the TV. Update your Harmony remote again. Then test each of your activities and that everything is working as normal and the TV is turning on from the totally powered off state.

Finally don’t forget to remove the temporarily added TV2 on your other Harmony remote and update that one.

You may sleep a little easier now you know your TV’s are totally powered off during the night and when not in use and your doing your little bit to save the planet. Now if only I could do something about that power sucking Windows Home Server beast that lives under the stairs.

www.phaze1digital.com

My latest Shark 007 codec setup (x64) with LAV Filters–Black Magic!

$
0
0

UPDATE 1: There appears to be a problem playing back some MKV movies using the LAV filter in version 3.3.9 of the Shark Codec Pack, I have started a thread here. This was not the case in the last version of the Shark Codec Pack I was using which was version 3.1.6. In this guide I recommend you use Haali Splitter on the MKV tab instead of using LAV for now. You can see my working version 3.1.6 LAV setup here.

For connection from your Windows Media Center PC to an Audio Visual Receiver (AVR) 5.1 surround sound pass-through. Either using a HDMI or Optical S/PDIF cable for audio.

image

This guide is based on Shark Codec Pack version 3.3.9. For x64 Windows 7 OS, ensure you download and install the 32bit version first and then download and install the 64bit components. What’s new since last time I wrote one of these Shark 007 guides is that we are now moving away from FFDSHOW and using the newer LAV Filters for most things. For reference I am using an Intel DH67CFB3 ITX motherboard with the on-chip Intel CPU/GPU. You may need to change some settings specific to your video card manufacturer ATI / Nvidia etc in their driver / graphics properties?

Download both setup files, to install them right click and Run as Administrator (It is recommended you leave Windows UAC turned on)

image

Run through the setup wizard, unselect Weatherbug if you don’t want to install that as well. Select the Complete installation option.

image

Once the installation is finished you need to do the same and install the x64 bit components (If your using Windows 64 bit OS). Run through the setup wizard.

image

When you install Shark 007 it installs a couple of things without asking you, so now go to control panel. Add/Remove programs and remove if you don’t want them the Bing and Ask toolbars. (Please don’t discuss this in my comments below, go do that elsewhere).

You should now have two new entries on your Windows start menu. “Settings Application x64” is used to configure codec settings for 64bit players such as Windows Media Center. “Settings Application” is used to configure codec settings for 32bit players such as Windows Media Player 12.

You should ALWAYS right click these shortcuts from the start menu and select Run as Administrator.

image

As this guide is for Windows Media Center I will be covering the 64bit settings, however the 32bit settings can be configured virtually the same way.

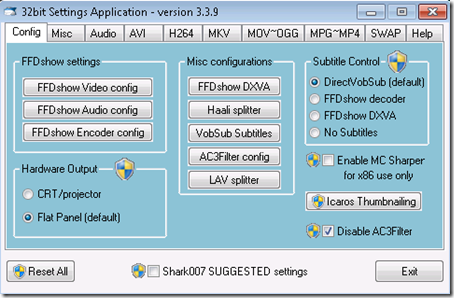
CONFIG Tab:

image

By default on 64 bit Windows 7, the default Windows Media Player is the 32 bit version, there is also a 64 bit version of WMP12, Shark recommends sticking with the 32bit version of WMP12 and not changing the default to be the 64 bit version. The Windows Media Center by default is 64 bit ! The x86 version of the shark codec pack is used to configure 32 bit players such as the default WMP12. And you use the x64 bit version of the shark codec pack for configuring 64 bit players such as Windows Media Center.

I normally change Subtitle Control to “No Subtitles” as I don’t have many files with subs, however if you require subtitles then leave it on the default setting of DirectVobSub. (Note this does not affect subtitles in DVD and Blu-ray discs only for video files).

I am going to make a slight variation in the FFDShow audio settings, I have some .MOV files which were originally downloaded from the Apple iTunes store. They were then DRM stripped, these files contain AAC audio tracks and the only way I could get them to play in Windows Media Center was to change the following setting in the FFDShow Audio Decoder configuration, you probably won’t need to do this.

image

I am changing the audio decoder for AAC audio from libavcodec to libfaad2

image

AUDIO Tab:

On the screen shot below you can see the default settings for the Audio tab which we will use. Now if you have followed any of my previous guides on Shark 007 setup you will know that I normally select use pass-through (Digital Audio) here for FFDShow S/PDIF pass-through. However in this version we are going to do something different and leave FFDShow pass-through turned off. Instead we are going to use the newer LAV audio.

image

Click the setup LAV Audio button above and then you will see the dialog below.

Note:- You don’t need to do this if you are not connecting your Media Center PC to an AVR and if you are just using the analogue audio 3.5mm jack output on the back of the PC to a stereo amplifier.

image

For setup with your AVR and to have the AVR do the audio decoding rather than the PC doing it, so the PC just passes through the audio to the AVR to decode the audio signals then check the following boxes.

image

AVI Tab:

The default is now back to use the Microsoft splitter. I was using Shark 007 codec pack version 3.1.6 previously and in that version the default option was set to use the LAV Splitter. I have only just upgraded from version 3.1.6 to version 3.3.9 for the purposes of this guide.

image

I didn’t have any issues playing AVI files in Windows Media Center with the LAV splitter so I am going to change this setting to use the LAV’s splitter again.

image

H.264 Tab:

I am going to stick with the default settings on the H.264 tab.

image

MKV Tab:

Again in this version 3.3.9 the default setting for MKV has reverted back to using the Haali Splitter. In version 3.1.6 the default was to use the new LAV splitter and MKV’s played well with LAV. I’ve just tested it and there seems to be a problem using the LAV splitter with MKV files in this version 3.3.9. So for now I suggest you leave it set to use the Haali splitter. Something must have changed from version 3.1.6 to break this.

image

I am also going to uncheck Disable DIVX Media Foundation splitter, as I have an XBOX 360 Media Center Extender and the DIVX Media Foundation is required to playback MKV files on the XBOX 360 Media Center Extender. If you don’t have an XBOX 360 Media Center Extender you can leave Disable DIVX Media Foundation checked.

MOV / OGG Tab:

Below you can see the default settings for the MOV / OGG tab.

image

Because I have a specific requirement to play these Apple iTunes DRM stripped MOV files I have, I am going to change a setting here. You can probably stick with the default settings shown above.

image

MPG / MP4 Tab:

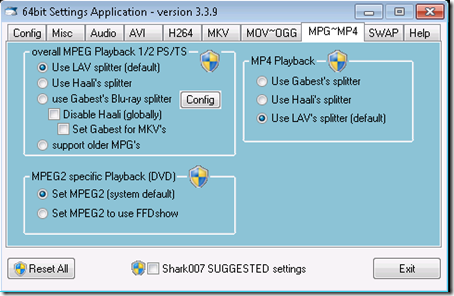
Below you can see the default settings for the MPG / MP4 tab. I am going to stick with these default settings.

image

SWAP Tab:

Below you can see the default settings on the SWAP tab.

image

Because I have some AVI files with 5.1 audio sound tracks in them, I am going to change one setting on the SWAP tab. I am going to tick Disable Windows DMO video codec. I find if I do not disable this setting when I play AVI files in Windows Media Center that have 5.1 audio they don’t play properly, the audio becomes out of sync and the video can get stuck for a moment and then speed up to catch up.

If I disable Windows DMO video codec all these problems go away and the AVI files with 5.1 audio play well in Windows Media Center. There is one drawback however, if you check this setting you will break online trailer playback in the My Movies Trailer Library. The trailers will not play at all and you will see a video error in Media Center. I’ve never been able to figure that out.

image

My configuration is now completed for the 64 bit Settings Application. I would recommend you now go back over each tab again and double check the settings are still correct as sometimes the application can change settings in the background without you knowing, once 100% happy go to the Misc tab and click the button to Save all settings.

32 bit Settings Application

Once I have finished my configuration in the 64 Settings Application, I then open the 32 bit Settings Application (Run as Administrator) and I set the same settings again in the 32 bit version.

image

Uninstalling Shark 007

We were always told by Shark to use the UNINSTALL button on the Help tab to remove his codec pack and not to use Add/Remove programs in Control Panel.

However I see in the codec pack change log which you can read here, that the later versions of the codec pack now support removal from Control Panel. I would probably still advise you use the UNISTALL button on the Help tab to be on the safe side. You should always remove the 64 bit Components first and then the 32 bit version. You must fully uninstall before you attempt to install any newer version of the codec pack.

When installing always install the 32 bit then the 64 bit version.

image

Testing your Configuration

To do this I have a collection of sample video files in various file formats and containers. I also have about 5 or 6 movies in different formats which I always use to test with. So basically I have a set of known video files that I know exactly how they should behave. I don’t currently have a new AVR that supports HDMI or the new Blu-ray HD audio formats. Dolby Digital True-HD and DTS-HD Master Audio, however trust me they will work. If anyone wants to donate to me a new AVR then please feel free!

Windows Media Center Speaker Setup

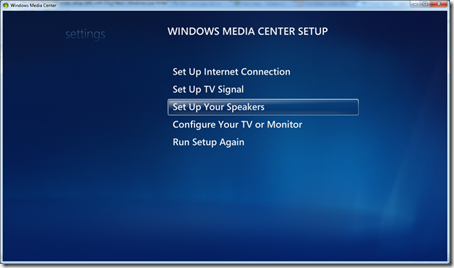
You should always first ensure you have run through the Windows Media Center speaker setup and selected 5.1. To do this go to the Tasks menu strip in WMC select Settings and then select General –> Windows Media Center Setup –> Setup your Speakers

image

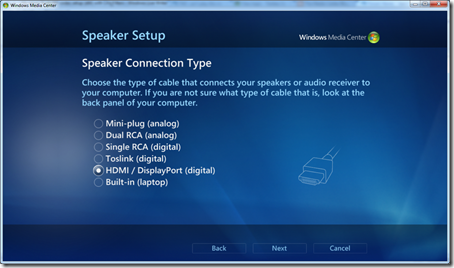
Select your connection type probably HDMI or in my case TOSLINK

image

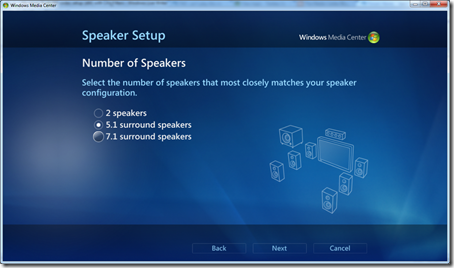
Select 5.1 Surround Sound and run through the rest of the wizard and finish.

image

Obviously if you are not configuring your Media Center PC for 5.1 and are just using a stereo amp and the analogue audio output of the PC then select 2 speakers.

DVD Playback with the Windows Media Center Player

First test some DVD movies with Dolby Digital and DTS audio. For this I use Indiana Jones and the Raiders of the Lost Ark (Dolby Digital) and Carlitos Way (DTS) but you have to select DTS from the Languages option on the DVD menu. If LAV audio pass-through is working then the AVR should decode the audio signal. This means on the front of the AVR it should light up with Dolby Digital or DTS and should not say PCM.

Blu-ray Playback with the Arcsoft TotalMedia Theatre 5 WMC add-in

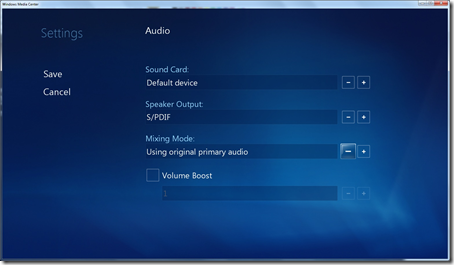
There are a few settings you need to check out first in the Arcsoft TMT5 WMC add-in settings.

image

Under Audio

Speaker Output: Should be either HDMI or in my case S/PDIF

Mixing Mode: Should be set to Using original primary audio

image

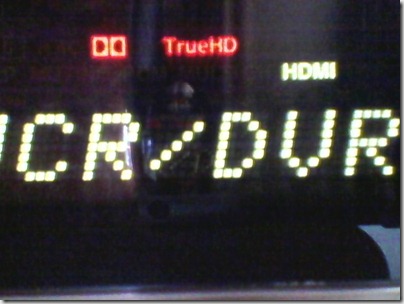
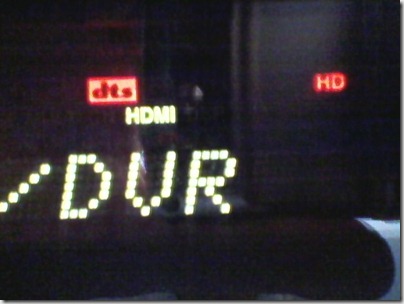
Test playback of two Blu-ray discs one that has Dolby Digital TrueHD and one that has DTS-HD Master Audio sound tracks. If you’ve got it right you should see the AVR light up as shown below.

Dolby Digital TrueHD on AVR display

SP_A0017

DTS-HD on AVR display

SP_A0016

Video File Playback

Now obviously that is a massive amount of different video file format types and containers out there. I setup my systems primarily to be able to play AVI and MKV’s within Windows Media Center. However I am able to play other formats as well, these are the video types I have tested.

  • DIVX-HD (AVI)
  • DIVX (AVI)
  • DVR-MS (Windows Vista Recorded TV)
  • FLV (Flash)
  • MKV (Use Haali Splitter not LAV in V3.3.9)
  • MOV
  • MPEG2
  • M2TS (I’ve got two M2TS sample clips one plays one doesn’t)
  • VOB (DVD)
  • WMV
  • WMV-HD
  • WTV (Windows 7 Recorded TV)
  • XVID (AVI)
  • M4V
  • MP4

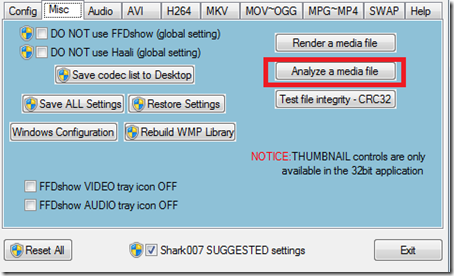
You can use Shark 007 to examine in more detail a particular video file. To do this go to the Misc tab and click the Analyse a media file button.

image

Browse to the video file and click Open, you will see the information for the video file in Notepad.

Below I used the Analyse media file feature on one of my .MOV movie files.

General
Complete name : \9 (2009).mov
Format : MPEG-4
Format profile : QuickTime
Codec ID : qt
File size : 932 MiB
Duration : 1h 19mn
Overall bit rate : 1 644 Kbps
Movie name : 9 (2009)
Performer : Shane Acker
Genre : Kids & Family
Recorded date : UTC 2009-12-29 08:00:00
Encoded date : UTC 2011-01-21 11:56:05
Tagged date : UTC 2011-01-21 12:21:37
Writing library : Apple QuickTime
Copyright : © 2009 Focus Features. All Rights Reserved.
Cover : Yes
desc : From visionary filmmakers Tim Burton (The Nightmare Before Christmas) and Timur Bekmambetov (Wanted) and Academy Award-nominated director Shane Acker comes this visually stunning and original epic adventure. In the final days of humanity, a dedicated scie
stik : 9

Video
ID : 2
Format : AVC
Format/Info : Advanced Video Codec
Format profile : Main@L3.0
Format settings, CABAC : No
Format settings, ReFrames : 2 frames
Format settings, GOP : M=2, N=24
Codec ID : avc1
Codec ID/Info : Advanced Video Coding
Duration : 1h 19mn
Duration_LastFrame : -8ms
Bit rate mode : Variable
Bit rate : 1 511 Kbps
Width : 640 pixels
Height : 460 pixels
Display aspect ratio : 1.855
Original display aspect ratio : 1.391
Frame rate mode : Constant
Frame rate : 23.976 fps
Color space : YUV
Chroma subsampling : 4:2:0
Bit depth : 8 bits
Scan type : Progressive
Bits/(Pixel*Frame) : 0.214
Stream size : 857 MiB (92%)
Language : English
Encoded date : UTC 2011-01-21 11:56:05
Tagged date : UTC 2011-01-21 12:21:37
Color primaries : BT.601-6 525, BT.1358 525, BT.1700 NTSC, SMPTE 170M
Transfer characteristics : BT.709-5, BT.1361
Matrix coefficients : BT.601-6 525, BT.1358 525, BT.1700 NTSC, SMPTE 170M

Audio
ID : 1
Format : AAC
Format/Info : Advanced Audio Codec
Format profile : LC
Duration : 1h 19mn
Bit rate mode : Variable
Bit rate : 126 Kbps
Channel(s) : 2 channels
Sampling rate : 44.1 KHz
Compression mode : Lossy
Stream size : 71.6 MiB (8%)
Language : English
Encoded date : UTC 2011-01-21 11:56:05
Tagged date : UTC 2011-01-21 12:21:37

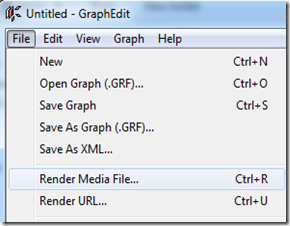
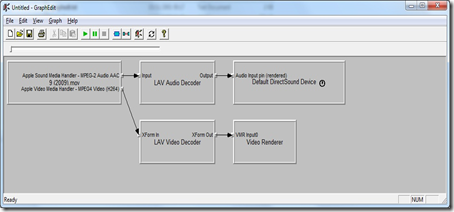
We can also use a utility called GraphEdit to see how the video file is being rendered by the system and what decoders are being used?

Open Graph Edit and select Render Media File

image

Looking at the same .MOV movie file I can see that the LAV Decoder is being used for both Video and Audio.

image

More tools can be found here.

Note:- I think GraphEdit is 32 bit so its the settings in the Shark 007 32 bit Settings Application that are reflected.

Well I think I’ve covered all the basics now and hopefully you have found this guide helpful. Codec as you probably know is a bit of a black art at the best of times and there is no right and wrong way to get all your video files playing, its just a case of having a little knowledge and being able to choose a solution that works well for you.

The Shark 007 user forums can be found here there is a Wiki here and also please do not forget to DONATE to Shark 007 if you find his codec pack useful.
www.phaze1digital.com

Forget Netflix! MCE LoveFilm 2.0 is here!!

$
0
0

You may have read my recent post here about MCE LoveFilm and the lack of a Netflix Windows Media Center add-in here in the UK. Well Martin Millmore of Milliesoft has been hard at work lately coding version 2.0 of his MCE LoveFilm add-in. I have been lucky enough to do all his beta testing so this version is pretty polished. There are new features and I think it works really well, version 2.0 is certainly a great improvement over previous releases and its the first version I have installed on to all my HTPC’s for everyday use!

I recently switched my LoveFilm package to the new unlimited streaming package which costs £4.99. Previously my package had no online streaming and was for discs in the post only.

MCE LoveFilm Setup:

Download and install the add-in from here. Once installed open Windows Media Center and launch the MCE LoveFilm add-in

image

image

The first time you launch MCE LoveFilm you will see this screen, click on Set LoveFilm Username.

image

A browser window will then open the LoveFilm website so you may need to minimize Media Center to see it.

Click the Link My Account button.

image

It will then say: Link To Account – Approved.

image

Now return to Windows Media Center and click the Click after authorizing button.

image

You will then see a Success dialogue click OK.

image

Your LoveFilm rental list should then be shown.

image

Now we need to login to the LoveFilm website via the MCE LoveFilm browser window. There are two ways to do this, you can navigate to the Settings on the pivot menu and select the LoveFilm Home Page button.

Note:- mine says “Thank you for purchasing MCE LoveFilm” as this is a purchased copy. I will talk about this more later.

image

When you click the LoveFilm Home Page button the MCE LoveFilm browser window will be launched outside of Media Center.

You only need to do this the first time, grab your mouse and select Sign In

image

Sign In

image

Or the first time you select to play a video you can press L on the keyboard and it will take you to the sign in screen.

Once you are logged in OK hit the backspace button on the keyboard to exit from the MCE LoveFilm browser window.

That’s it your setup of MCE LoveFilm is now complete and we can now look at the MCE add-in in more detail.

My Rental Lists

If you’re an existing LoveFilm user and you receive discs in the post then you will probably have some titles already listed in the My Rental Lists section. These are the titles you have selected to “Rent”.

I can see which title(s) I have at home and other titles shown in “Stuart’s List” are titles I was waiting to get the discs for.

image

If you press OK on a title you will see the titles overlay details page. I can select to remove the title from my rental list if I decide I don’t want the disc after all.
image

When browsing the genres for new titles I can choose to rent any title that is available on disc, by simply clicking the rent button, this will add that title to your rental list.

image

Once you have selected a title to be rented, you can set the priority of that rental. To do this go to actions on the menu and then you can select if this rental should be High Med or Low priority.

image

Genres

By selecting genres from the pivot menu we can select titles by genre. For example if I select action/adventure then I will see all the titles in that genre.

image

You can see there are some new pivot menu options, we can now in version 2.0, filter the titles by Blu-ray / DVD / Watch Online. This is a critical new feature and makes finding titles by format for rent much easier, and it also allows us to view titles that are available to watch online.

Note:- Pay Per View and Free watch online titles are not currently visible in MCE LoveFilm, only titles that you can watch with your package are displayed. This may change in later versions of MCE LoveFilm.

image

If we select a title, in this example I have selected Inception from the Blu-ray section, I can either play trailer or rent this disc. The front cover and the synopsis can also been seen. Unfortunately you cannot read the full synopsis, Martin tells me LoveFilm limit their synopsis text to 200 characters and there’s nothing he can do about it. We can also see the star rating as from the LoveFilm website.

image

We can also push up and navigate to the cast + crew menu. Here we can select directors and actors.

image

If I select an actor then all Blu-ray titles that this particular actor stars in will be displayed. If I navigate to the DVD or Watch Online sections it will also list titles for that actor under those sections as well.

image

Action/Adventure genre DVD’s

image

Action/Adventure genre Watch Online

image

You can see in the above screen shots that only 50 titles are displayed at a time (Paid for version of MCE LoveFilm) You can scroll right to the end of the titles and then select the big arrow to bring up the next 50 titles

image

In the free version of MCE LoveFilm I believe you can only see 25 titles, which means you will need to probably purchase the add-in if you want the full functionality, the price is currently £9.99 per PC. Personally I think version 2.0 is now worth buying. Perhaps Milliesoft can introduce some multi PC prices ? You can compare the free and premium features here.

All of the functions of MCE LoveFilm within Windows Media Center work with the remote control. However in this new version Martin is using a custom made browser window to display and play the Silverlight video from the LoveFilm website, this is external of Windows Media Center. The videos should auto play without your interaction.

In the screen shot below I have selected a title from the Watch Online section, you can see I now have an additional play button as well as play trailer and rent buttons. If I select play WMC will be auto minimized and the MCE LoveFilm browser window will be opened.

Note:- Due to limitations with the lack of information made available to MCE LoveFilm from the LoveFilm website, Martin is unable to accurately tell if a trailer is actually available for a title or not? So therefore the play trailer button is always there in Media Center, but you may find for some titles once the video page is displayed no trailer is actually available.

image

Once you click on Play or Play Trailer as shown on the above screen shot, the MCE LoveFilm browser window launches externally outside of Windows Media Center and displays the LoveFilm website zoomed in to the video playback area of that page. Depending on which button you selected in Media Center, auto mouse movements will select to play the trailer or watch now with package.

image

Video playback

image

Don’t under any circumstances use your mouse and click the Full Screen button in the top left hand corner. You don’t need to press or use this button. If you do you will end up with a blank black screen and no picture and you won’t easily be able to exit out. Martin says the reason for this is “Because the full screen Silverlight control blocks all key inputs to the application”. So just don’t press that button!

You can however use the volume control and other transport controls as shown below. You can press the 0 button on your remote control to pause and play the videos.

Pressing the BACK button on the remote control however will close the MCE LoveFilm browser window and return you nicely back to MCE LoveFilm in Media Center.

image

Due to LoveFilm not consistently placing the video playback area in the same position on each webpage on their website, we have to occasionally adjust the screens position. Don’t panic, we can easily do this using the up down / left right directional arrows on the remote control.

In this screen shot you can see the video is not quite fitting the screen correctly. To correct this I just have to press down arrow on my remote a few times till the video image fills the screen nicely.

image

Video playback after using the directional arrows to move its position.

image

These issues sound a lot worse than they actually are, I would suggest you install the MCE LoveFilm add-in for yourself and try it out . Over time I expect Milliesoft will improve things further and make things more seamless.

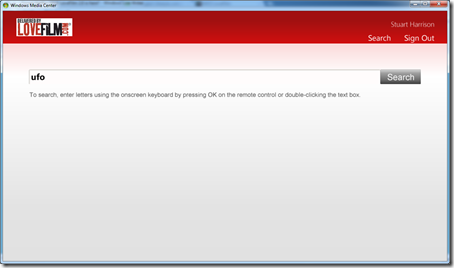
Search – There is also a search button at the top right.

image

image

Summary

Overall this is a solid release of MCE LoveFilm allot of the kinks have been ironed out now and I will certainly be using this add-in for the first time on my TV screens and my youngest daughter is now happily watching Thomas the Tank Engine. As you are probably aware there is no official LoveFilm Windows Media Center add-in but we are able to use this great 3rd party add-in thanks to Martin at Milliesoft

image

Netflix for Windows Media Center

With regards to the official Netflix Windows Media Center add-in and that it is still only available to users in the US. It is my opinion that it is fairly unlikely that UK users will be given access to the add-in. I can’t say for sure obviously and I might be wrong but users in Canada and Brazil never got it either. And I can’t see that any of the threads on the Netflix forums have received an answer either.

If Netflix / Microsoft are unwilling to give UK Windows Media Center users what they want, I would suggest said UK Windows Media Center users vote with their wallets. Stick to LoveFilm and use MCE LoveFilm for your Windows Media Center PC!


MCE LoveFilm updated–2.1.1

$
0
0

My new favourite Windows Media Center add-in MCE LoveFilm has been updated to version 2.1.1

What’s new since version 2.0 ?

  • Added "New Releases" and "Just Added"
  • Added the ability to save favourites.
  • Online favourites for licensed customers.
  • Improved streaming capabilities.

New Releases and Just Added are now available under genres, this should make finding new content a little easier.

image

image

Favourites - you can now add titles in to a favourites list, I think this is a handy feature for when you are browsing around looking for titles of interest, you can now mark them for later viewing and find them in the new favourites menu item.

image

image

Online favourites for licensed customers. You can now set a pin code in the settings on each HTPC that you have MCE LoveFilm installed on. The idea is that your favourites are stored in the “cloud” and you can access the same set of favourite titles from multiple HTPC’s running MCE LoveFilm.

image

You can now also install a web browser extension for Chrome and Firefox, which enables you to browse the LoveFilm website and then click a button to add the current title to your MCE LoveFilm favourites. Full details are here.

Still on my wish list are watched icons and for the TV Series / Episodes to be grouped like they are in TunerFree MCE.

Standard MCE remote control - DVD button to launch My Movies!

$
0
0

I’ve wanted to be able to do this for along time but never figured it out and then I switched to using Logitech Harmony universal remote controls. But I had a requirement this week to be able to press the DVD button on a standard MCE remote control and for My Movies to be launched and not the native 7MC Movie Library.

image

There are probably many ways you can do this using programs such as Girder, Intelliremote, Eventghost, LM Remote KeyMap, ControlRemote to name a few.

However I wanted to just edit the registry to change the functionality of the remote controls DVD button and to use AutoHotKey which I am already using on the HTPC.

So if you want to do this, its a two stage process, first you need to edit the registry and change the DVD button to use a different keyboard command. By default Ctrl+Shift+M launches the native Movie Library. I wanted to change this so that Ctrl+Alt+M would be used. Secondly you need a small AutoHotkey script that detects Ctrl+Alt+M and launches the My Movies entry point in Media Center.

Editing the registry:

Open regedit and navigate to this key:

HKEY_LOCAL_MACHINE\SYSTEM\CurrentControlSet\services\HidIr\Remotes\745a17a0-74d3-11d0-b6fe-00a0c90f57da

Right click 745a17a0-74d3-11d0-b6fe-00a0c90f57da and select Export from the menu.

image

Save it as HIDIR.reg

Right click 745a17a0-74d3-11d0-b6fe-00a0c90f57da again and export again and save a second copy as HIDIR-Modified.reg

Now find where you saved HIDIR-Modified.reg right click it and select edit. It will then open in notepad.

Scroll down to the end of the file and add:

,24,00,00,00,04,05,\
10

The Report Mapping Table should look like the below, I’ve marked in bold the code we added.

"ReportMappingTable"=hex:01,00,00,00,04,00,1e,02,00,00,00,04,00,1f,03,00,00,00,\
04,00,20,04,00,00,00,04,00,21,05,00,00,00,04,00,22,06,00,00,00,04,00,23,07,\
00,00,00,04,00,24,08,00,00,00,04,00,25,09,00,00,00,04,00,26,00,00,00,00,04,\
00,27,0b,00,00,00,04,00,28,0a,00,00,00,04,00,29,1d,00,00,00,04,02,25,1c,00,\
00,00,04,02,20,1f,00,00,00,04,00,51,1e,00,00,00,04,00,52,21,00,00,00,04,00,\
4f,20,00,00,00,04,00,50,22,00,00,00,04,00,28,4e,00,00,00,01,08,02,0f,00,00,\
00,01,09,02,23,00,00,00,01,24,02,3b,00,00,00,01,04,02,16,00,00,00,01,b0,00,\
18,00,00,00,01,b1,00,17,00,00,00,01,b2,00,14,00,00,00,01,b3,00,15,00,00,00,\
01,b4,00,1a,00,00,00,01,b5,00,1b,00,00,00,01,b6,00,19,00,00,00,01,b7,00,6e,\
00,00,00,01,cd,00,10,00,00,00,01,e9,00,11,00,00,00,01,ea,00,0e,00,00,00,01,\
e2,00,26,00,00,00,01,8d,00,12,00,00,00,01,9c,00,13,00,00,00,01,9d,00,0c,00,\
00,00,03,82,00,29,00,00,00,03,83,00,2a,00,00,00,03,82,00,24,00,00,00,04,05,\
10

Save the HIDIR-Modified.reg file and then double click it to load it back in to the registry.

Or you can download my already edited HIDIR-Modified.reg file from my Sky Drive here.

Add the AutoHotKey script:

If your not already using AutoHotKey you will need to download and install from here. When you install it, it asks you if you want to create a sample script file in your Documents folder say yes.

You should have a green icon with a H on it in your system tray, if not find AutoHotKey from the start menu and click on it, then in the system tray right click the AutoHotKey icon and select Edit script.

image

image

Paste the below code in to the end of the file:

^!m::
IfWinExist Untitled - My Movies
WinActivate
else
Run %windir%\ehome\ehshell.exe /entrypoint:{8984aed5-7c9d-42f0-b2ad-c39bbcf04a25}\{810d7b87-1300-4aed-a700-1c6179f8f14b}
return

Save the AutoHotKey.ahk file and ensure you add AutoHotKey in to the Windows Startup folder so AutoHotkey runs at startup. Then reboot the PC.

Now when you press the DVD button on your standard MCE remote control the My Movies – Movie Library should be opened and not the native 7MC Movie Library !

If you need to restore your registry back to how it was before you started just double click on HIDIR.reg that you created in the first step.

More details can be found on The Green Button here

Installing Windows 8 Consumer Preview first thoughts

$
0
0

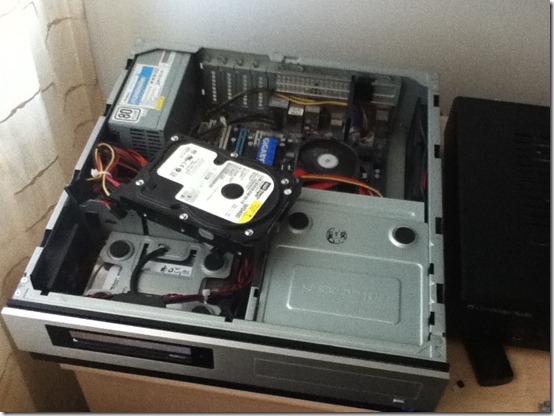
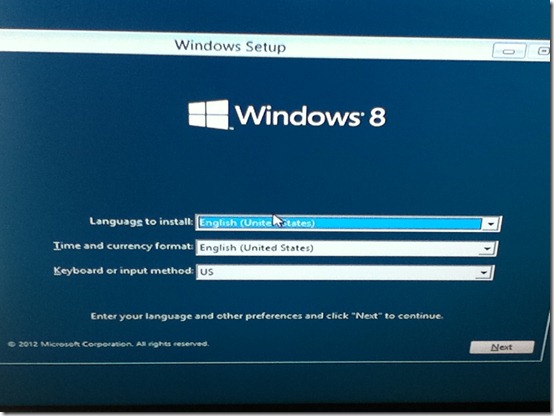
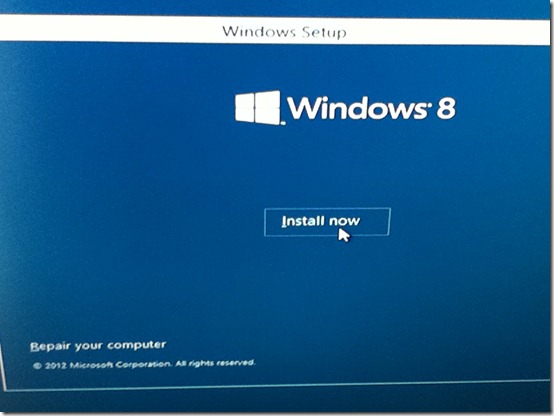
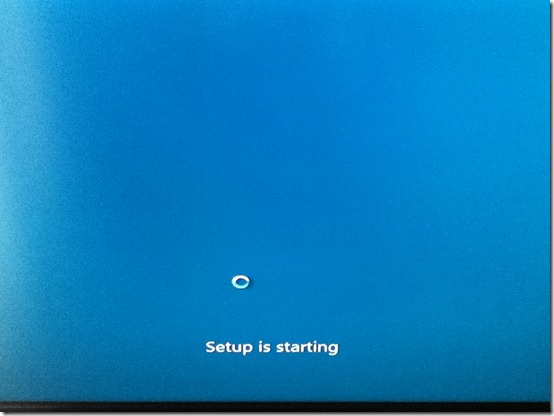
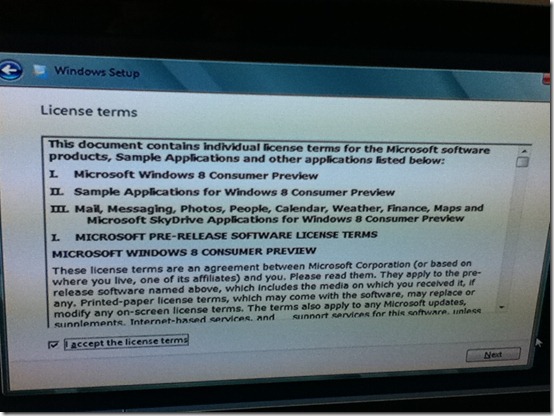
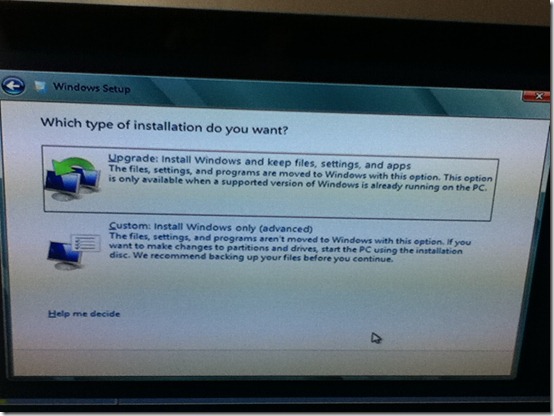
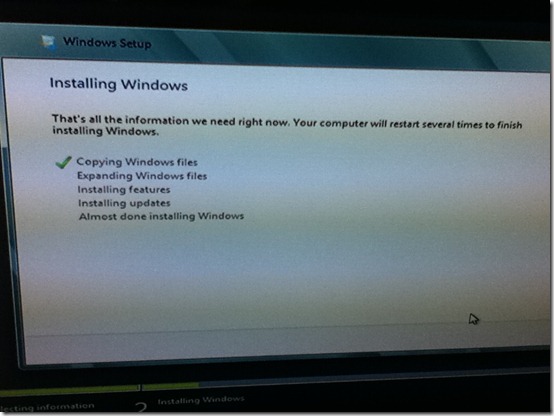
Just a quick post as I’ve installed Windows 8 CP on to my older HTPC today and took some photos on my iPod.

You can download the ISO images from here

I installed the X64 bit English version.

I used an old 40GB Western Digital IDE hard disk.

45

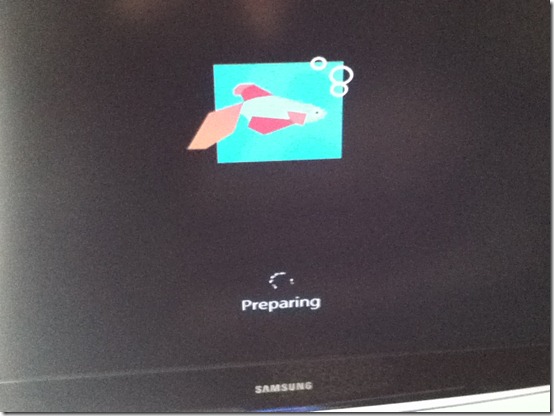
A fish!

43

You can choose UK for Time and Currency Format and for the Keyboard, you then end up with a UK location in the region settings.

46

47

48

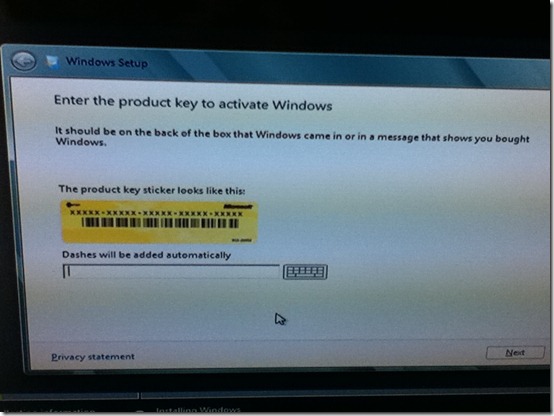
Product Key: DNJXJ-7XBW8-2378T-X22TX-BKG7J

49

50

51

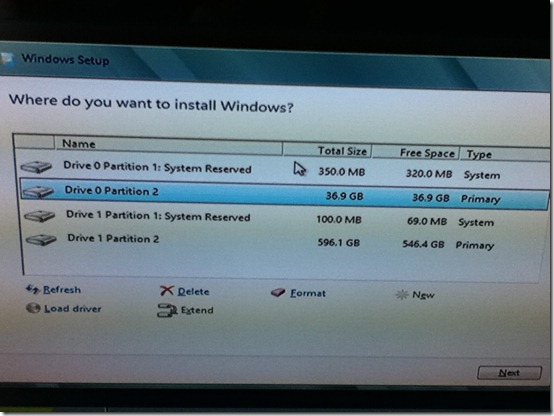
The System Reserved partition that Windows creates during setup has increased from 100MB to 350MB.

52

53

55

56

58

59

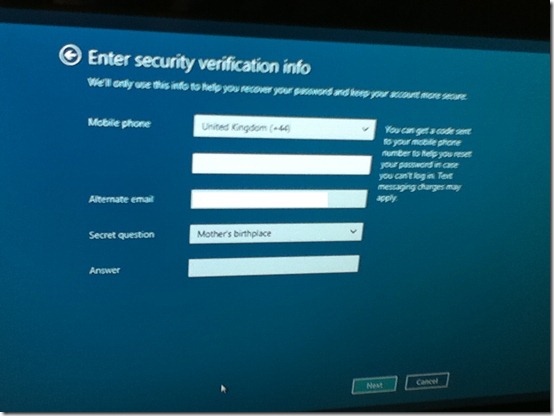
Setups asks for your email address to create a new Microsoft account, I used my regular Live ID details.

60

61

62

63

64

66

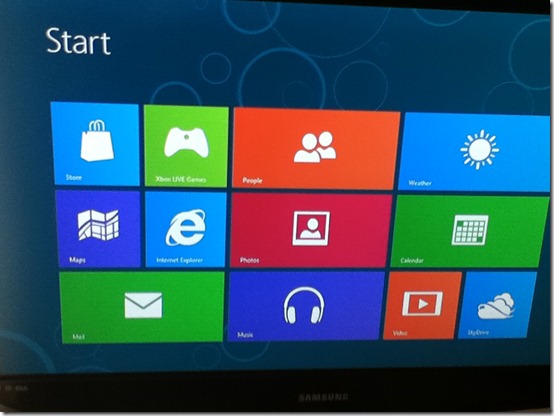
I have to say the new Metro Start menu for me is confusing and makes finding what you want to do difficult, I’m sure with some time you would get use to it, but I’m not sure I’d use it on my workstations and would probably go back to a classic start menu which you can do in the registry. Obviously the Metro start menu is going to work better on tablets, touch screen devices etc.

To get the "classic" start menu back set the below registry key.

HKEY_CURRENT_USER\Software\Microsoft\Windows\CurrentVersion\Explorer

RPEnabled (DWORD) = 0

I configured Windows Media Player and Media Center as usual and added content in to the WMP library from my WHS shares. I was able to install the WHS V1 Connector OK.

However when I go in to the new Metro Music, Videos and Photos apps they are all empty showing no files, I’m not sure why this is?

I quickly tested Media Center (Not Live TV) and installed some of the 3rd party MCE add-ins I use.

Not working:

Microsoft UK MSN Player - Installs OK but every time I play a video I see: Video Error - There was a problem accessing this video.

However the video does then start to play in the background, if I click OK on the Video Error dialogue the video then stop playing.

My Movies - Installer checks Windows Version and won't proceed

Macrotube - Youtube videos not playing just get the blue MCE background

Appears to be Working:

MCE LoveFilm - Possible issue with existing titles in favourites, now all say "no streaming"

TunerFree MCE - Installing DRM update for WMP was not as straight forward as normal

Also I now have two menu strips in 8MC called Milliesoft instead of one, both have MCE LoveFilm and TunerFree icons on them.

RadioTime (TuneIn)

mControl - Home Automation - Could not find the mControl Client Config utility from the start menu / apps area / search - How do you see the normal program groups?

Other issues

WMP/8MC is doing some strange things. If I look in Windows Explorer I can see a D:\ System Reserved drive and E:\ which is my other Windows 7 drive. Initially in WMP E:\ drive could be seen in the WMP library as a mobile device and I had all sorts of weird stuff in the WMP library that shouldn't have been there. I could also see this E:\ drive in 8MC in the Photos and Video Libraries.

I rebooted and then in WMP/8MC it showed the D:\ System Reserved drive instead and I can now see this drive in Media Center in the Photos and Video libraries. Why is this happening?

ATI CCC isn't working? / doesn't look as normal, I can't see any usual options for desktop graphics properties, only CPU and Power Plan Settings. So can't set the scaling on the desktop size.

1280X720 is too small a resolution for the Metro Media apps to run ??? Had to change to 1080P but my Samsung TV only supports 720P native.

Summary

Obviously its early days, but my first day with Windows 8 I would have to say has been frustrating and confusing. But I need to spend more time and get use to things and testing more. Hopefully the Metro start menu will grow on me the more I use it. I was able to pin Windows Media Center and Windows Media Player on to the new start menu, to initially find them I had to use the search feature of the Metro start menu as they are not visible anywhere. WMP appears to still be version 12 I didn’t compare the version number to a Windows 7 PC, WMP looks the same to me as does Media Center.

How have you been getting on with Windows 8 ?

Looking at XBMC again – Part1

$
0
0
I decided to look at XBMC again but in much more detail this time with a possible view of actually migrating away from Windows Media Center to XBMC. Why you may ask? Well I still love WMC and its served my needs very well over the years, I still have a live system running on all the TV’’s in my home, the back-end is a home made WHS server with My Movies. I think everyone is aware now that WMC is a legacy product, yes it will still be available in the Pro version of Windows 8 with a paid download and yes that means it is still going to be around for many years yet. But it means that nothing is really going to be changing with WMC as far as new features and development goes, well at least not from Microsoft but third party developers I’m sure will continue. I don’t think XBMC will come close to WMC in the PVR department, this Wiki page suggests you can use XBMC as a PVR but its under heavy development. Anyone using it?
So anyhow I downloaded the latest version of XBMC Eden 11 for Windows and installed it on my laptop. If I do decided to switch to XBMC I will probably go the whole hog and use some distribution of Linux as well! But for now Windows it is. I initially plan to keep the back-end running My Movies for WHS too much work to ditch everything and start totally from scratch although that may happen if I go live with XBMC. My Movies has some integration / support for XBMC. In the Collection Management and in the WHS console you can enable metadata for XBMC which will create NFO / TBN files for all your Movie titles. They don’t support XBMC metadata for TV Series at the moment which is a bit of a problem to say the least.
I was recommended Ember Media Manager by a friend and I am currently using that to scrape for data and create the NFO / TBN files for my TV Series on video files. I can seem to get TV Series that are on DVD rips to even be displayed properly or play in XBMC at the moment, I have a feeling it just doesn’t work? Or maybe I’m not doing it quite right?
The first thing that hits you with XBMC is just the potential of what could be possible with it and the sheer size and scope of development, there are so many skins and program addons and addons of all types. I have already installed addons for BBC iPlayer, ITV Player, 40D, Demand5 and TVCatchup, had a quick go with them and they seem to work pretty well, none as pretty as TunerFree MCE but you don’t have to contend with embedded webpages, all the videos play natively in the XBMC player. The other thing that hits you is the number of settings, they seems to be way to many for my liking especially when compared to WMC. But I guess settings means you can do a lot more if you know what those settings do?
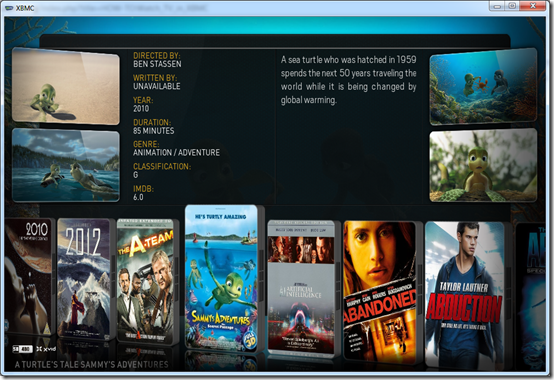
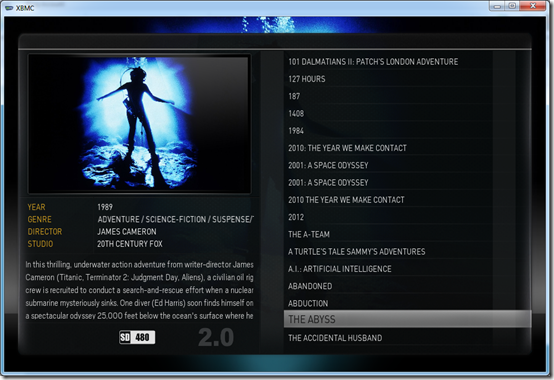
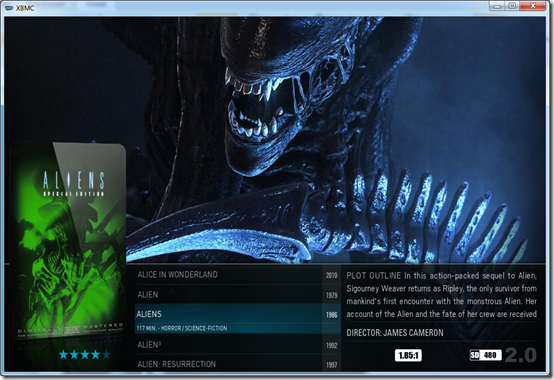
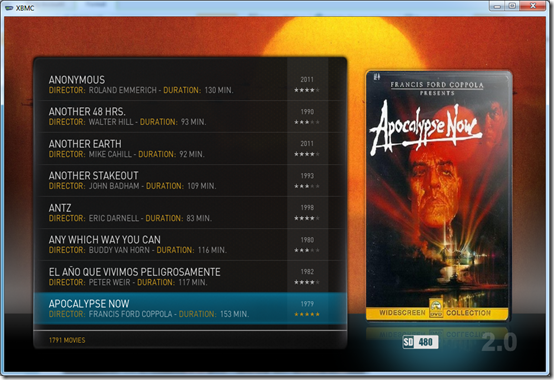
Below are some screen shots of my standalone XBMC install on the laptop, although it is linked to all the media files on the WHS so has full libraries built up. I am currently using the Aeon MQ3 skin which appears to be the best looking and my friend who is an XBMC guru and has been helping me a bit, says its just the best skin to have!
If I get in to XBMC more I may post up some demo videos of my setup when I am  happy with it.
Main start menu – not sure what they call it.
Movies
image
TV Shows
image
Whilst on the start menu you can push up and go to Recent. I am assuming its listing recently added TV shows although it might be recently watched?
imageYou can do the same on the Movies menu as well as on the Music and Concerts menus.
image
Music menu item
image
Videos menu item
image
Concerts menu item – This only appeared after I had installed the Aeon MQ3 skin.
image
Images menu item – You can move the position of the main menu by pressing up or down, this is in the down position. I don’t like the images area its only folder / file browsing mode there is no pictures library like WMC / WMP.
image
Shutdown
image
Settings
image
And finally weather
image
I haven’t actually tried using a remote control as yet so can’t comment on that.
Movies - Views
Wall
image
3D Wall
image
Showcase
There was an artwork addon that had to be added for the Aeon MQ3 skin, this artwork addon scrapes for additional images like the four thumbs you can see below. It has saved these additional images in each movies folder on my WHS. I had a bit of a panic when I saw it doing this but it appears not to have over written any existing images that My Movies had put there.
image
Cover Flow had to be there didn’t it!
image
Shelf
image
Large List
image
Low List
image
Panel
image
List
image
Multiplex
image
As you can see with this Aeon MQ3 skin there are a lot of views in the movie library. It is recommended you turn off the views you know you wont be using, makes it faster apparently.
You can right click any movie title and select Movie Information from the popup menu to see a screen like this
image
I have to say the native codec support is well, amazing. It plays Blu-rays out of the box (Main movie only). The XBMC player played virtually every file format and container I threw at it, from my collection of test sample video files. There were two things it did not play for me, one being WTV files (DVR-MS OK) and the second being some .MOV files I had which originally came from the iTunes store. It did play other .MOV files I had fine however. I have not connected to an AVR yet and tried to bit stream, does that work? Looks like XBMC has a new Audio system coming in version 12 called Audio Engine.
Well that’s it for part one more in part two. Let me know if you are a Windows Media Center user? and how you feel about its future and your plans if any, to stay or move away?

LED Strip Lighting Project–Part1

$
0
0
I’ve been thinking about buying some LED Strip lights for some time now and I finally decided to order some kits from eBay. You might want to consider Aliexpress as well. Most sellers are located in Hong Kong / China which is where I ordered mine from. The extremely helpful seller I used was called kaistore168 and she was able to do me a customised order and I bought additional items not listed on her auctions at pretty cheap prices. I ordered my LED Driver PSU’s from this seller delhanway2009.
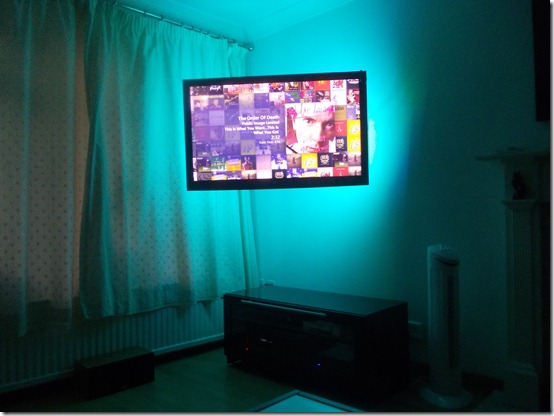
I plan to use the waterproof 5050 2x 5M reels outside in the back garden / deck (with a RF Touch Remote on the wall near the back door). I also bought a cheaper 5M 3528 non-waterproof kit for use in doors, where I am going to put some LED lighting under the kick boards in the kitchen (using the second RF Touch Remote) and also behind my wall mounted HDTV in the living room (with the IR 44 Key Remote). I bought the IR remote control version for the living room so I could use my Logitech Harmony 895 to control the LED back-lighting behind the TV and even add it in to activities etc.
Below are the items I purchased:

5050 5M SMD 300 Leds Waterproof RGB LED Strip+ RF Wireless Touch Remote Controller System + Additional 5M Reel


Additional RF Wireless Touching Remote Controller For LED RGB Strip 12V/24V RGB Controller


5M 3528 300 LEDs Non-Waterproof LED Strip Light+44 Keys IR Remote Controller


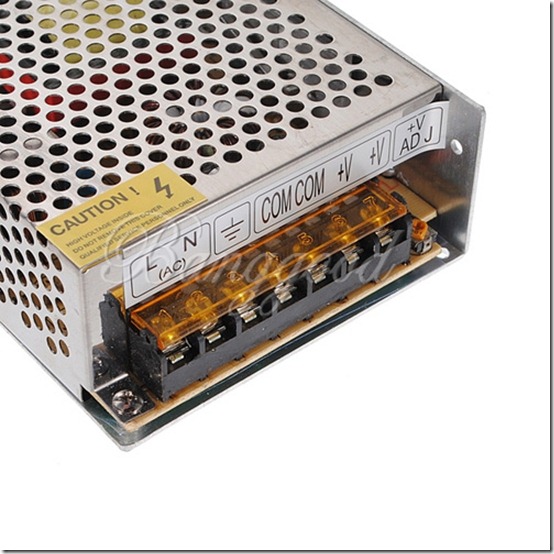
DC 12V 15A 180W Switch Power Supply Driver Transformer For LED Strip Light 220V

To drive the 10M LED’s in the back garden / deck. 15Amps is enough to drive 15M of 5050 Led strips so I have a bit of overhead.

DC 12V 2A 24W Switching Power Supply Driver For LED Strip Light 220V Transformer

To drive the 2.5M 3528 LED’s in the kitchen under the kick boards.

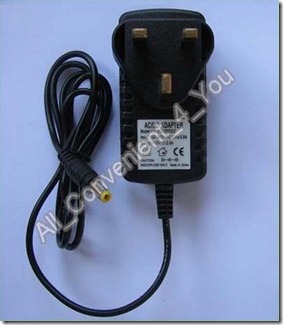
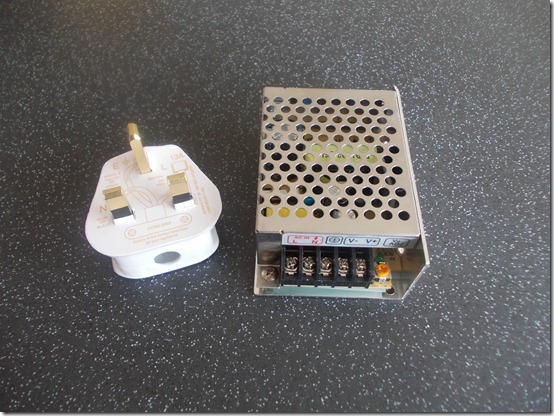
UK DC 12V 2A Switching Power Supply adapter 100-240V AC

For use behind my HDTV in the living room, to drive 2.5M of 3528 LED’s.

PSU1
I also found a UK LED specialist that supplies the silicone end caps needed for joining strips (creating right angles) outside. This video here shows how to fit them. You can buy right angled pieces off eBay but I didn’t see the point if you can solder your own wires. This same supplier also has the RGB 4 Core cable here.

I saw a really good article that explained the difference between 5050 and 3528 LED’s but I can’t find it now, so will just link to a Google search. Basically the LED’s are different sizes, brightness and power consumption etc. One thing to watch out for is make sure you are getting 300 LED’s per 5M and not 150 LED’s, if something looks too cheap then its probably 150 Led’s only.
Well I have to wait 10 days or so for delivery, lets hope everything arrives or this is going to be a real short series of posts.

LED Strip Lighting Project–Part2

$
0
0
My first LED Driver Power Supply unit turned up from China, only took 9 days to get to the UK which wasn’t bad.

DC 12V 15A 180W Switch Power Supply Driver Transformer For LED Strip Light 220V

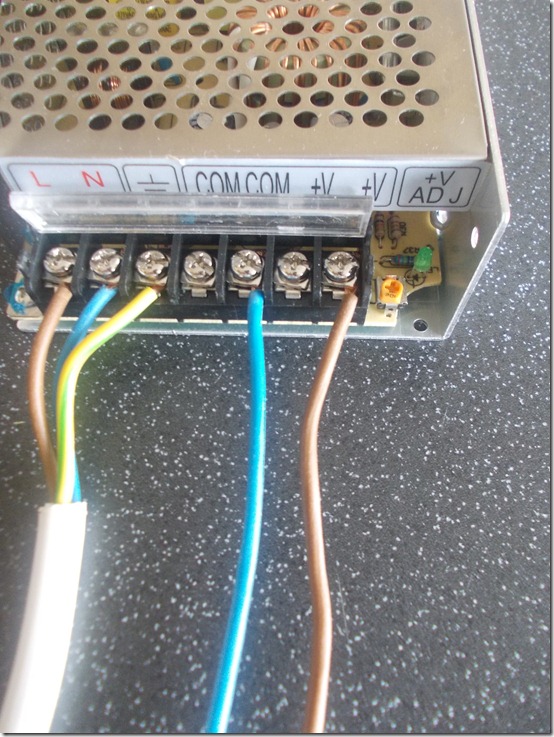
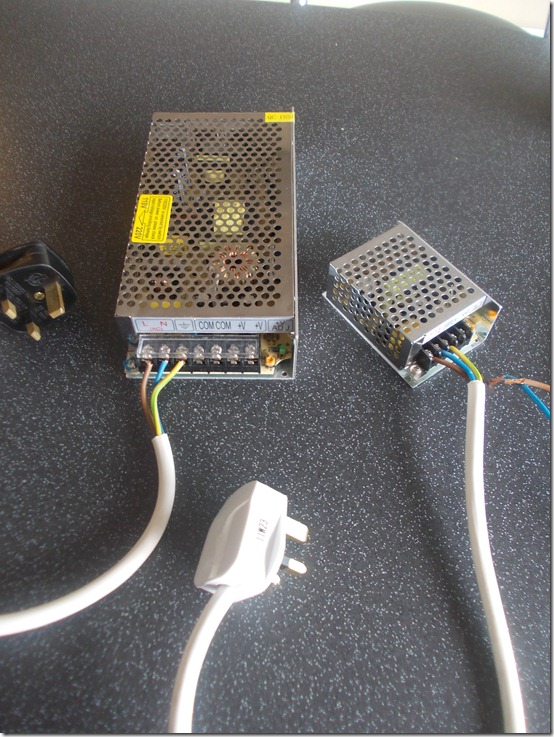
The power supply is all you get, no cables no instructions. You can see there are terminals for Live, Neutral, Earth / Ground, there are 2x COM (Common or negative) and two +V which is the DC positive. There is also a +V adjustment screw, they are set to 12V DC as standard so you shouldn’t need to move this adjustment screw, I did test mine with a multi-meter to double check it was outputting 12V DC which it was.
PSU1
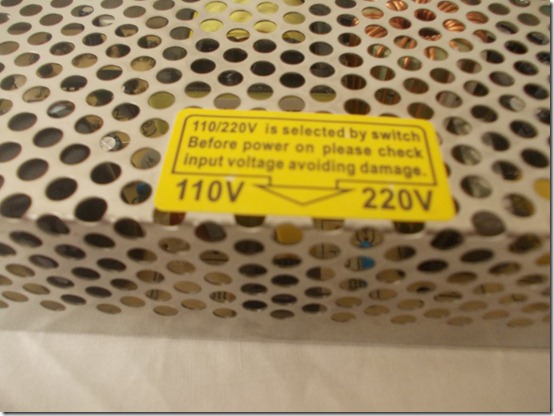
There is also a 110 V / 220 V switch on the inside, mine was set to 220 V by default which is correct for the UK, if your in the US it would have to be set to 110V. It is very important you set this switch correctly before attempting to plug in to the mains supply or you will probably blow up the power supply unit.
You can’t really see on this photo but the 110 V / 220 V switch is located inside you can flick the switch with a thin screwdriver.
DSCN0610
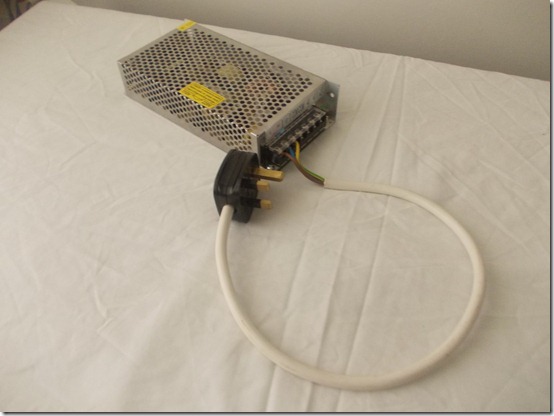
I just used some regular 3 core electrical flex cable and a 13amp plug
DSCN0612
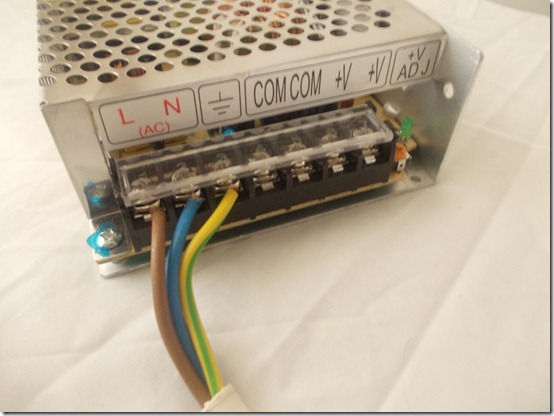
Here you can see the wiring for the AC mains input, UK colours:
brown = live
blue = neutral
yellow with green = earth / ground
DSCN0611
There is a good American Youtube video here about wiring up your LED Driver Power Supply, they don’t seem to use Earth / Ground on the American videos I have watched.
WARNING:
This should be very obvious but do not connect the plug to the mains wall socket and then touch the exposed wires as you will electrocute yourself and believe me a 240V shock is not nice! I’ve had a few in the past when working on old computers that weren’t as safe as they are these days. Watch the Youtube video for more information.
Well that’s it for part 2 as this is the only component to arrive so far, more coming soon.

LED Strip Lighting Project–Part3

$
0
0
The rest of my order arrived yesterday from China, no import tax or duties either as the seller I used ships from Hong Kong via Sweden to the UK.
I was keen to get started and install some of the LED lights in the house.
DSCN0613
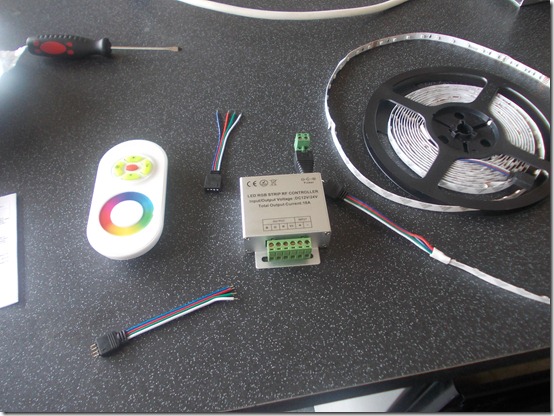
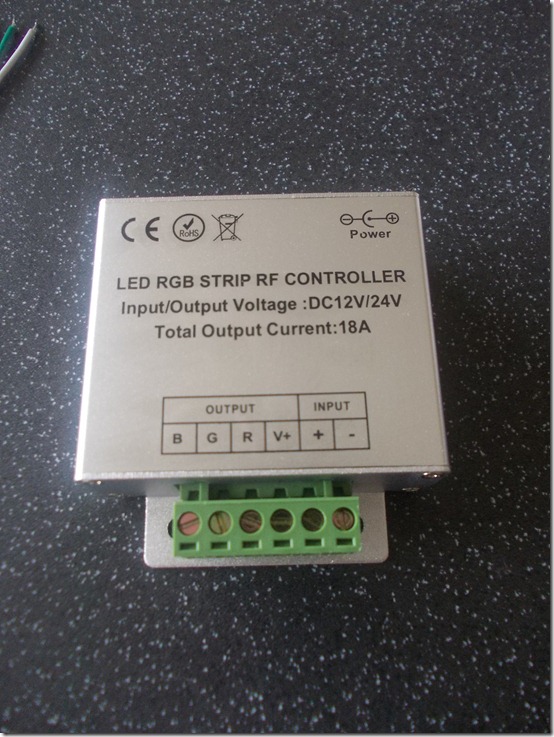
This is the LED Controller that comes with the RF touch colour wheel remote control.
DSCN0614
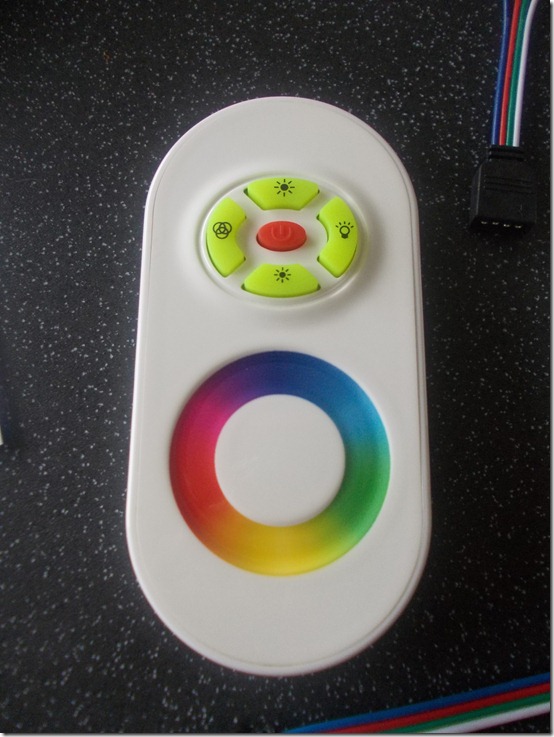
RF touch colour wheel remote control, takes 3x AAA batteries, the reason I picked this particular RF remote over the other variation that is available on eBay is that this one has more lighting modes, 15 in total.
DSCN0615
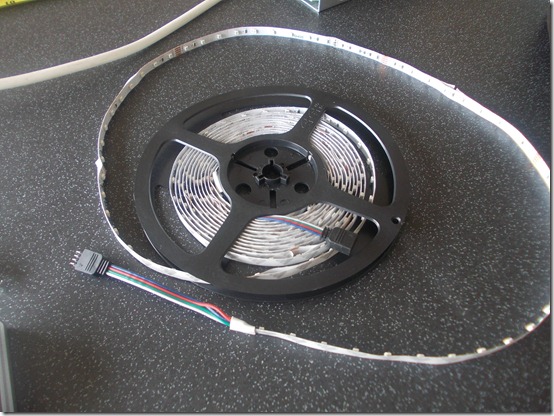
After testing the LED reels I was not happy with the 3528 indoor one it only seems to do Red,Green,Blue and not multi-colours or white, perhaps I didn’t read the specs. I did plan to use this 3528 reel in the kitchen and behind the TV in the living room, however decided not to use it and instead use one of the 5050 outdoor reels instead. Will probably resell the 3528 reel and buy another 5050 one.
DSCN0616
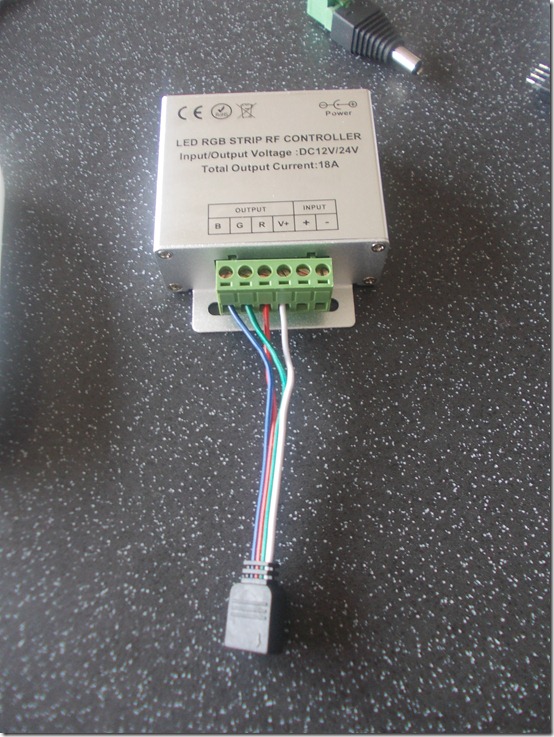
Below is a picture of the four pin connector / cable that came with the LED Controller, this connects to the LED reel. Four cables, Blue,Green,Red and White which is V+
For the actual 12V power supply input I think you can wire in to the INPUT + and – sockets on the green connector block, however you can see top right I purchased a DC power jack connector instead.
DSCN0617
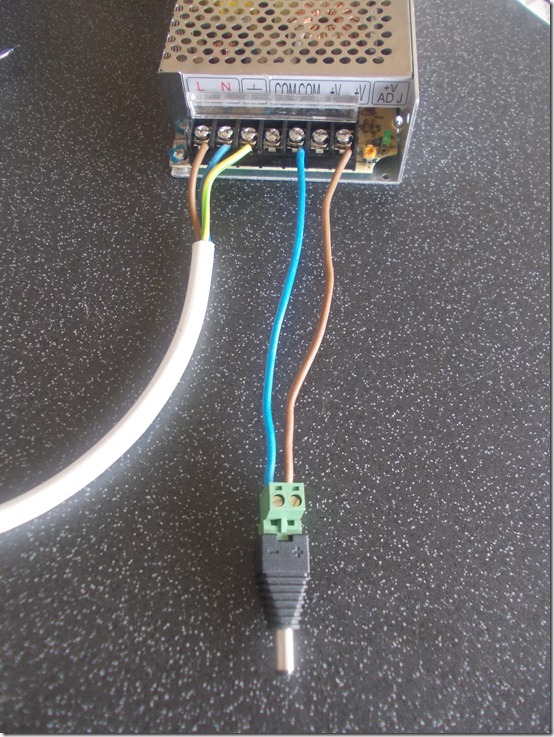
COM / V+ on the LED driver power supply two cables.
The colours should have probably been COM = Black V+ = Red however I just used a bit of blue and brown cable from the inside of a 3 core electrical cable.
DSCN0618
Which connect to the DC power jack connector which then plugs in to the LED controller unit.
DSCN0619
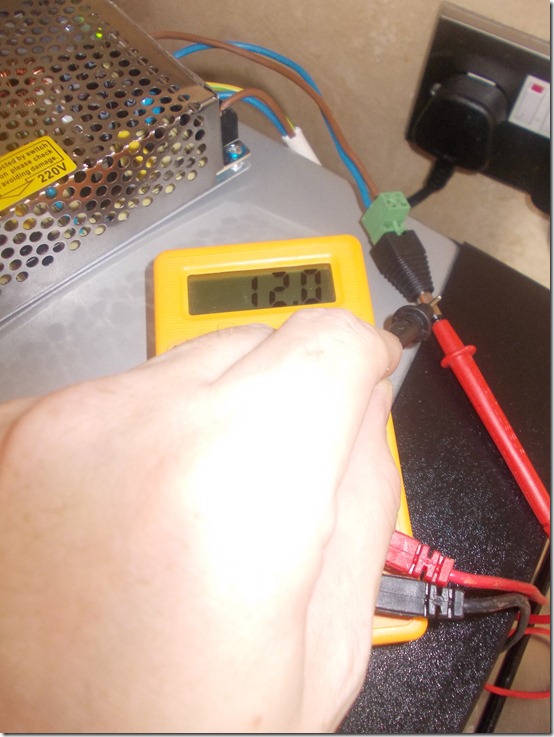
Using a multi-meter to double check I am getting 12 Volts DC from the DC power jack connector.
DSCN0621
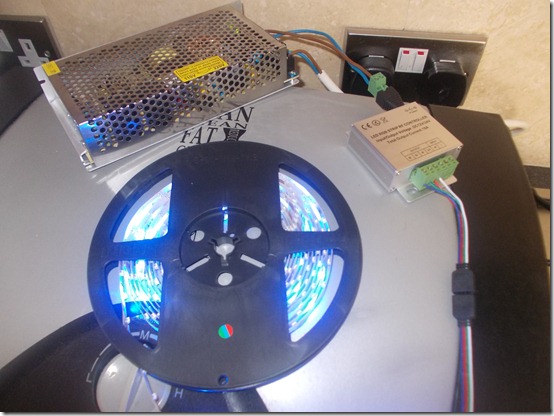
First switch on!
DSCN0622
Installing the 5050 reel under the kitchen kick boards
DSCN0623
60 LEDs per metre
DSCN0624
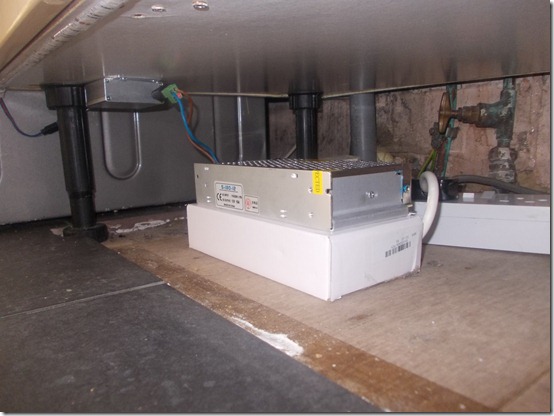
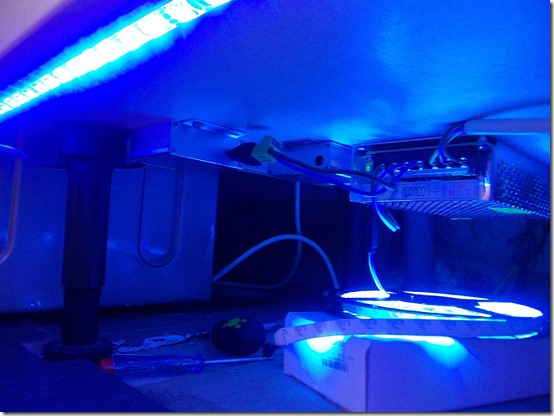
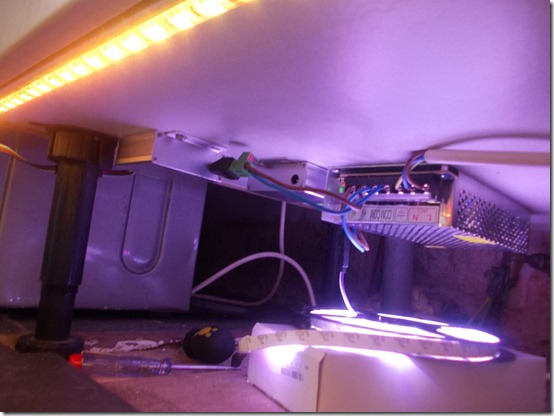
Here you can see under the kitchen cupboard which will be hidden by the kick board. I had to install a new double electric socket, this powers the LED Driver power supply unit, which I sat on a box in case my washing machine leaks which you can see is right next to it. The LED Controller unit can be seen fixed to the underneath of the cupboard. I will probably tidy this up and mount everything up out of the way.
DSCN0625
To get round the right angle of the cupboards, I thought I would have to cut the LED strip and join with cables however the strip was flexible enough just to kink it and get round the right angle.
DSCN0627
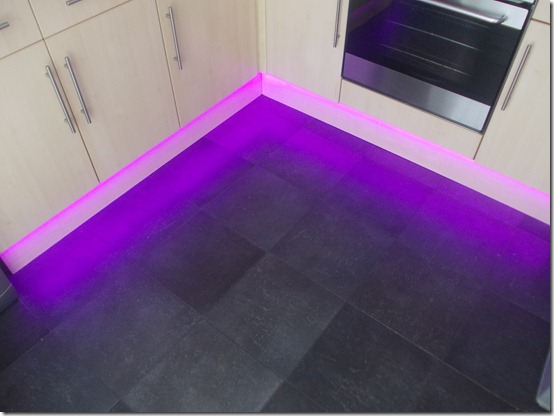
The finished installation
DSCN0628
DSCN0629
Youtube video of my new Kitchen LED lights!
Stuart’s Kitchen

I mounted the RF remote control on the kitchen wall next to the under floor heating controller, using velcro. You can actually buy proper wall mounted colour wheel controllers that fit in to a backbox, but that's more money and more wiring.


That’s it for part 3 in part 4 I will look at creating a custom LED strip loom for behind the wall mounted HDTV in the living room. Get your soldering iron at the ready!

LED Strip Lighting Project–Part4

$
0
0
In part 3 I used about 3 metres of 5050 LED strip in the kitchen, that left me with about 2 metres to create something for the back of the wall mounted HDTV in the living room.
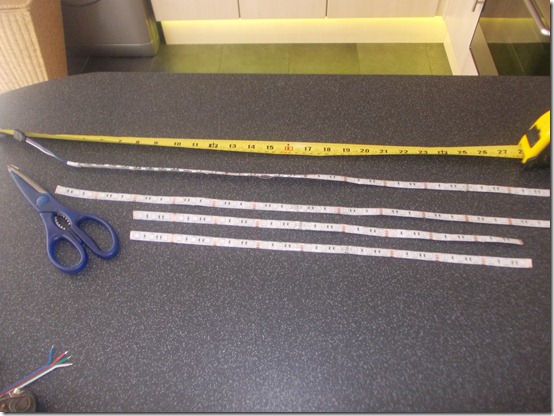
With the length of LED strip I had left I measured and worked out the lengths of four pieces. You can cut these LED strips at the marked intervals.
DSCN0633
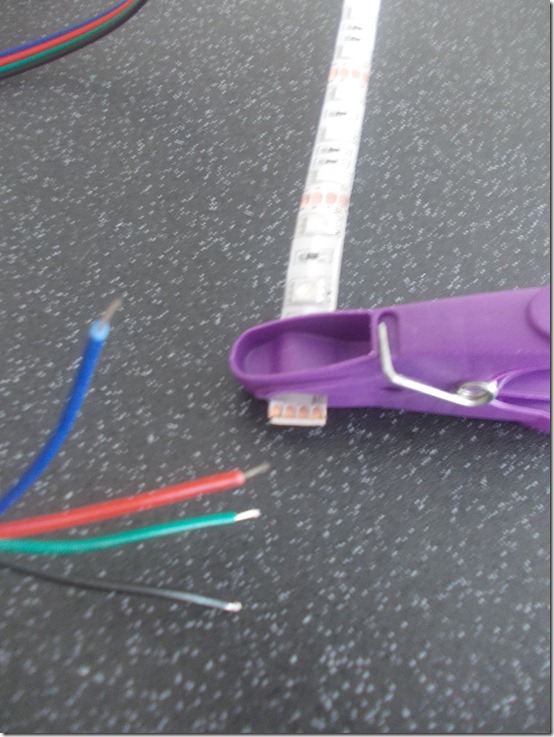
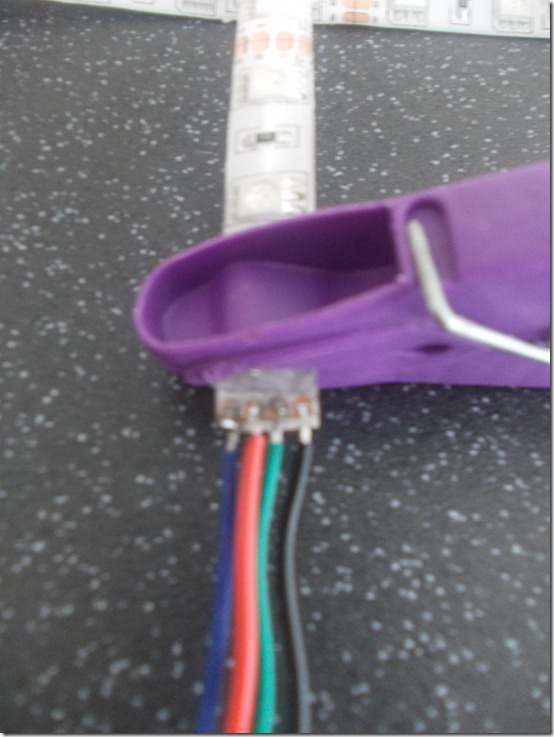
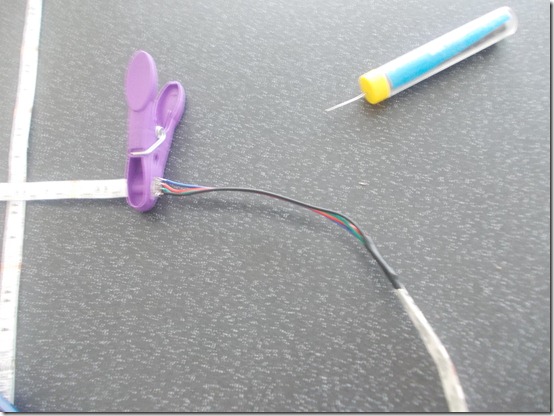
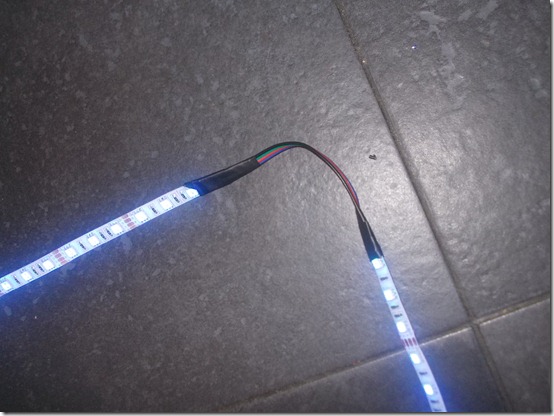
As this was a waterproof LED strip I was working on, I had to slice back the silicone cover with a Stanley knife to reveal the four golden contact pins. The peg was used to keep the silicone cover held back out of the way. Using the LED cable I bought I had to use maybe 2 inch lengths of this cable that would join the 4 LED strips, this will become clearer in pictures further down the page.
DSCN0635
Now I am not going to lie soldering these cables on was allot harder than I imagined, keeping in mind the LED strip is only 8MM wide and the contact pins are very close together, I’ve done quite a bit of soldering before but I am by no means an expert and my shaky hands don’t really help either. Ideally You need a keen eye and a steady hand for the job.
You should tin the ends of each cable first with solder and I found if I put a small blob of solder on each of the four contact pins on the LED strip first, when I came to attach the cable it was much easier. However the biggest problem as the contact pins are so close together, is ensuring that you do not bridge the gap between these contacts with your solder or wires etc.
DSCN0637
This is the desired result joining two of the LED strips with our LED cable so we can create a right angle bend behind the TV.
DSCN0640
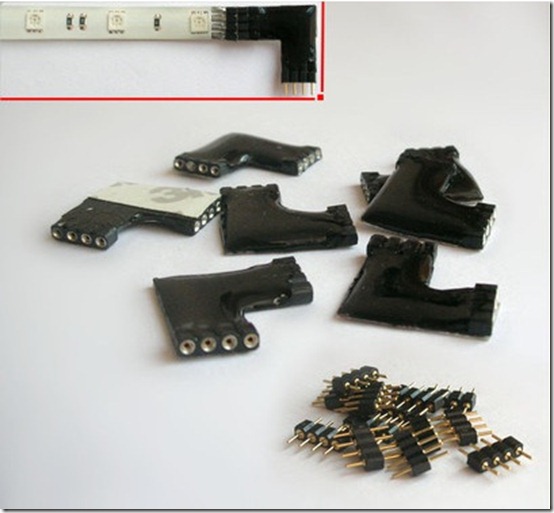
You can buy right angled LED pieces off eBay like the ones shown below, but I can’t see how they would help? As you still need to solder them on?
LED-RightAngle
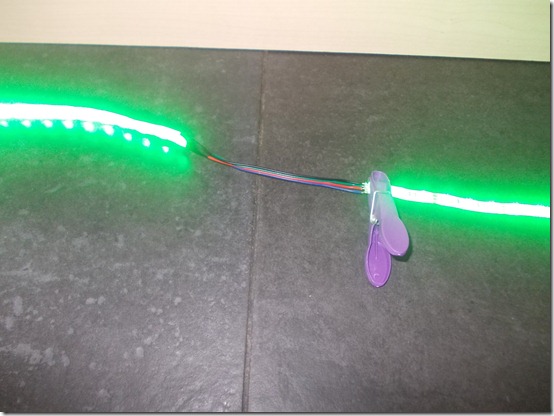
I think its important to test each join you create before proceeding to the next one.
DSCN0641
Here you can get an idea of how it might look when stuck behind the TV, once I had finished soldering I carefully attached some black electrical tape over the ends.
DSCN0643
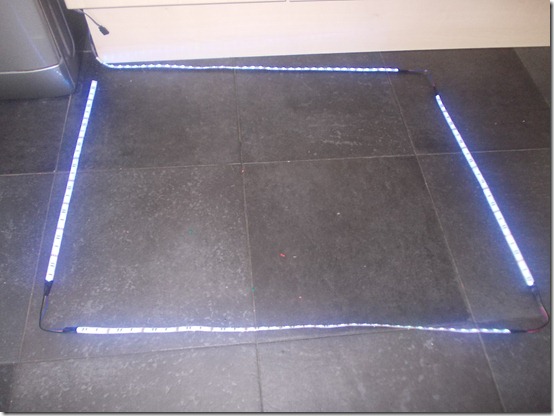
Here you can see the completed loom laid out on the kitchen floor.
DSCN0644
Note there are only 3 corners that I joined using the LED cable, the last one top left is just cut off at the end and does not join back round to the start.
DSCN0645
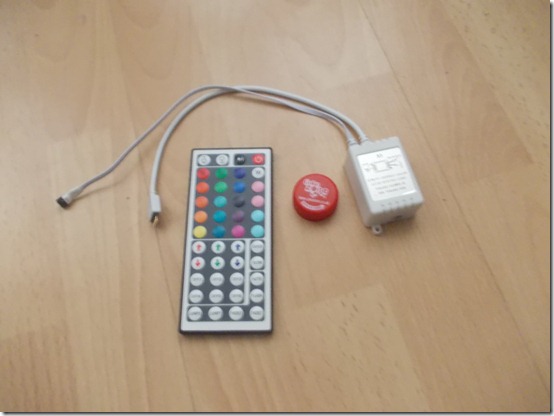
As this loom is going behind the TV I opted for an IR remote control and not RF. This is so I can program my Logitech Harmony universal remote control to control the LED lights, I will then not use the original 44 key LED remote control.
The LED controller is also allot smaller than it looks in the pictures on eBay when compared to the top off a bottle of Coke.
DSCN0650
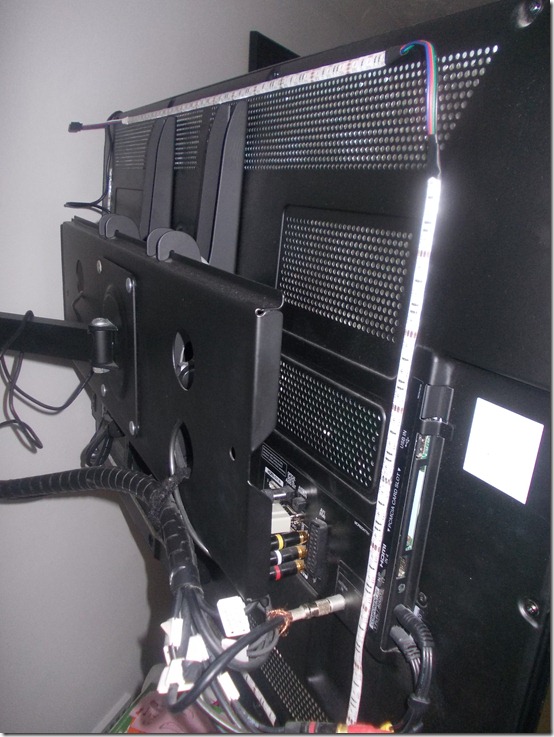
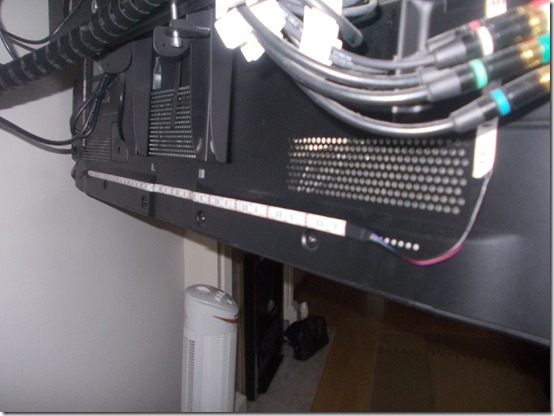
OK so now I am starting to attach the LED strip to the back of the TV, I forgot to mention in part 3 that these LED strips all have sticky 3M backing.
DSCN0651
DSCN0652
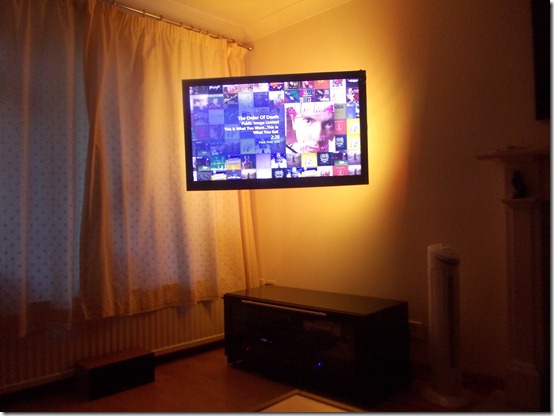
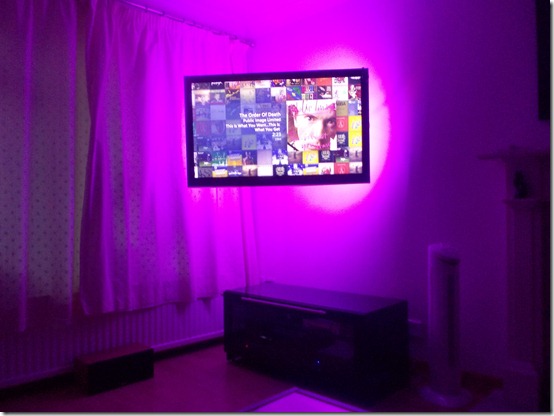
Completed installation.
DSCN0656
On all these photographs and in the YouTube video there is a light halo, you don’t actually see this in real life and the pictures and video don’t really do it justice to how well it really looks.
DSCN0655
DSCN0657
YouTube video of the completed installation.
Stuart’s Living Room
Well that’s it for part 4. In part 5 I may cover programming and teaching your Logitech Harmony universal remote control to be able to control the LED lights instead of using the supplied IR remote control. Or I may look at my LED installation in the back garden, but I’ve not done that yet and its raining allot here in the UK so maybe a few weeks away.

LED Strip Lighting Project–Part5

$
0
0
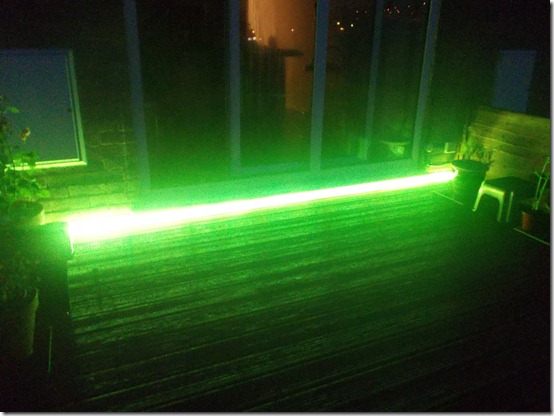
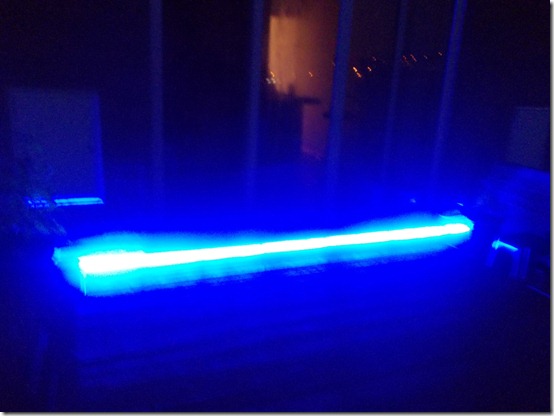
I wanted to install some LED lights outside on the decking. I figured out I could run two 5050 LED Controllers and LED strips from the one large 15amp LED Driver power supply, so I hooked up my second LED Controller / RF touch remote kit.
Testing the second LED Controller connected to the same 15A power supply
DSCN0680
The LED strip in the kitchen and the one just outside on the deck won’t be in colour sync, however I wanted two LED Controllers and two RF touch remote controls, so I could independently control the kitchen or deck lights. As I didn’t want the outside lights on all the time if I just wanted the ones in the kitchen on.
I drilled a hole out in the corner behind the washing machine, through the external wall which I then fed through the cables to the outside.
DSCN0681
I did actually buy a 2 amp LED driver power supply but I didn’t need it in the end, I will use this behind the kids wall mounted TV in their bedroom as they now want LED lights in their room, I just need to buy another IR remote control and LED controller, will probably buy the cheaper 24 key IR version.
2 Amp LED Driver Power Supply is allot smaller than I imagined it would be.
DSCN0676
Larger 15A Power Supply left and the smaller 2A Power Supply right.
DSCN0677
Patio window at the rear of the house / decking area.
DSCN0686
The hole in the wall from the kitchen is just below the electric meter box on the left of the picture, this is where the LED strip starts and at the other end on the right the LED strip is just cut off to length.
DSCN0685
Pink!
DSCN0687
The LED’s are much brighter than I imagined and light up the decking area well. I was going to add a second LED strip at the opposite side of the decking but I don’t think I will bother, one strip seems to be bright enough.
DSCN0684
Not the best picture but its very Blue!
DSCN0682
I added an ACT HomePro Z-WAVE appliance plug under the kitchen cupboards that plugs into the 15 amp LED Driver power supply, this will enable me to turn on and off the LED lights from the mControl Home Automation system rather than just being able to use the RF touch remotes, I will also now be able to set on/off timers and also to cut all power to the LED Driver power supply which I wouldn’t have been able to do other wise with the kick boards in place.
762102651781
mControl MCML add-in for Windows Media Center with custom LED Lights device icon.
Back Garden – LED Lights – ON/OFF
mControl-LED-CustomIcon1
Kitchen – LED Lights - ON/OFF
mControl-LED-CustomIcon9
mControl for Internet Explorer
mControl-LED-CustomIcon2

Youtube Video:


Well that’s it, once I’ve gotten the LEDs up and running behind the kids bedroom TV I think I will be all done on the LED lighting front, for now at least!
Next project? Maybe some bespoke Z-wave enabled motorized Somfy blackout roller blinds!

Stolen my blog articles and traffic for cash generation?

$
0
0
Update: Blogger aka Google have now taken down the offending site. I have to say their response time was much quicker than I expected it would be, so a big thumbs up to them for sorting it out!

Its come to my attention that there is a cloned fake “The Media Center Blog” on the Internet, the fake blog can be found here: http://phonemediacenter.blogspot.co.uk. Whoever created this blog has stolen a large selection of my past article content, every article on the fake site was originally written by myself. I can only assume they have done this to steal content and traffic to generate cash as there is a Paid-To-Promote banner at the top of the fake blog.

I am currently discussing this with the legal team at Google with the hope that the fake blog will be taken down off the Internet. If you happen to see any other blogs that look like they contain my Media Center blog content please let me know so I can report those as well.

I don’t know how long the fake blog has existed? But the ticker says 2000 + hits and it is now appearing in Google search results for Media Center and related keywords that I write about.

My genuine URL’s for my two blogs are:

http://windowsmediacenter.blogspot.co.uk/
http://thedigitallifestyle.com/w/index.php/author/cw-kid/

If you have a Google Blogger blog and find yourself in the same situation you can contact Google by filling out a DMCA Report.

http://support.google.com/bin/
request.py?&product=blogger&contact_type=lr_dmca 

Thanks

Stuart.

mControl & VeraLite integration nightmare!

$
0
0
largeVERA-LITE
Most of you who read my blog will know I am a mControl Home Automation user and I’ve done several posts about mControl in the past. I decided to sign up for a dealership with Micasaverde and purchase a VeraLite unit for testing. My plan was always to keep mControl as its integrated in to Windows Media Center on every TV in the house!
I was told by a friend of mine that he had successfully integrated mControl & Vera using the mControl Vera Luup Driver. With my original setup with mControl I was using an Aeon Labs Z-stick as the primary Z-wave controller, this was connected to the back of the WHSV1 server where mControl is installed. The plan when VeraLite box arrived was to use the VeraLite as the primary Z-wave controller and then use the mControl Vera Luup Driver which sends HTTP requests to Vera to control your lights and other devices, thus making the Z-stick totally redundant and no longer required. This all sounded great however now I have got the VeraLite box up and running the integration between the two systems has not gone as smoothly as I would have liked and there are two big problems that are making this integration a no go.
I have done a YouTube video explaining what these two problems are and until I get them resolved my mControl installation is now basically broken!
The problems in short are:
1. Device status not being correctly updated in mControl UI - Turn lamp on via mControl UI and mControl does not update the status of the device and shows it as still OFF when actually the lamp has turned on OK. Also the dim level stays at 0% when should be 100% (Vera Luup Device Type = Dimable Light).
2. ON button not working properly for appliance modules - The off button in mControl UI does work and the ON button also turns off the appliance. ON button does not turn on the appliance module.
(Vera Luup Device Type = Binary Light)
Watch the Youtube video to see what I mean, this is a call out to any other mControl and Vera or VeraLite users that have got this setup and working for any advise or possible solutions.
There is a 3 page thread I started on the Micasaverde forum about these issues, also one here and one here on the mControl forums. I don’t know who originally wrote the mControl Vera Luup driver? I have contacted mControl support but no reply as yet. I may now contact Micasaverde support as well see if they know anything? Although I have contacted them a few days ago about another question of how to make the Z-stick a secondary to VeraLite being primary controller as I see this as a plan B if I can’t get the mControl Vera Luup driver working, but I’ve not heard from their support either yet! Not sure how long is a normal wait time?
I am really liking Vera however in the few days I have been using it, I bought it mainly so I could have timers for lights coming on and off that will work when the mControl WHS server is in sleep mode. But Vera is showing to be a very powerful and cheap Z-wave Home Automation gateway solution. I will probably do some blog posts about Vera when I have got it all setup and know how stuff works more.

Add a Google Chrome icon in to Windows Media Center

$
0
0
I previously wrote about a method of adding an Internet Explorer icon in to Windows Media Center here using a utility called Media Center Launcher Configurator. There is a newer utility called Relaunch which I think is a better tool for this job. You can use Relaunch to add any icon you wish in to Media Center to launch your desktop applications.  When using Relaunch to create an icon also know as a tile, when you select this icon from the Media Center menu, Media Center is automatically minimized and your desktop application launched, when you then close the launched desktop application, Media Center is automatically maximized.

Download the latest version of Relaunch from here currently version 202. The utility is a standalone .exe file that requires no installation so you can save it and run it from any folder on your PC, I created a folder for it under C:\Program Files (x86)\Relaunch an saved the .exe in to here.
Right click the .exe and run as Administrator

image

Now there are some predefined tiles you can select and add in to Media Center

image

We are going to create our own new custom tile.

Under App to Launch select Custom

With: Chrome

Trigger: Change this to Close App (The GreenButton) trigger seems to be problematic and kept crashing Chrome on my PC.)

Uncheck Fullsceen unless you want Chrome to be launched in to fullscreen?

URL: You can add any URL in to the URL field this is the webpage that will be loaded when Google Chrome is launched.

Name: Google Chrome (Name that appears under the tile in Media Center)

Image: Browse to the path of your .PNG icon image for this custom tile. I just found one from a Google image search, if you are too lazy you can download my icon below from my SkyDrive.

image

Once all the fields have been populated correctly click the Add button.
Note: I recommend you close down Media Center whilst doing this.
After clicking add your new custom tile called Google Chrome will be listed under Current Tiles. You can select these current tiles and click the Remove button to remove the tile from Media Center.

image

Now open Media Center and navigate to the Extra’s Library your new Google Chrome icon will be in there.

image

You can then use a program like Media Center Studio if you wish to move the icon on to one of the menu strips in Media Center, I moved it to the Extra’s menu strip.

image

image

How Relaunch works is it creates an MCL file under:
C:\Users\YourUsername\AppData\Roaming\Media Center Programs

Below you can see the code within the MCL file:

<application run="C:\Users\Stuart\AppData\Local\Relaunch\googlechrome.exe"
Name = "Google Chrome"
bgcolor="RGB(0,0,0)"
startimage="C:\Users\Stuart\AppData\Local\Relaunch\googlechrome.png"
thumbnailImage=""
sharedviewport="false" >
</application>

You can download my Google Chrome .PNG icon from here
Now because we selected Close App as the trigger when we setup the tile in Relaunch you need some method of exiting Google Chrome on the TV screen to be returned to Media Center. If you are using a wireless keyboard/mouse or a smart phone mouse cursor app you can just click the Red X in the top right hand corner to exit Chrome and Media Center will be restored.

I have previously programmed my Logitech Harmony universal remote control with a custom button that sends a Ctrl+F4 command to close applications down.

Following on from Ian’s post the other day, my next blog post will be about the new www.youtube.com/tv user interface for YouTube on your big screen, I will also be using Relaunch to create an icon in Media Center to launch this YouTube TV interface in to Chrome. I will also cover some of the setup and how to connect your Android and iOS device for remote control of the YouTube TV UI.

UPDATE: The below is from the developer of Relaunch:

Here is some clarification:
Close App works by waiting for chrome.exe to close and then it relaunches Media Center. Green button waits for ehome.exe (AKA Media Center) to come back into focus.  As soon as Media Center comes back into focus it will close Chrome. This later option is what you were running into.

Close App is intended to work exactly as you are now using it.

Green button is intended to work by launching Chrome. When the green button is pressed, Media Center will come back into focus and Chrome will be closed. By using the full screen (or kiosk mode) you can link to youtube.com/tv and have it launch without all the window trimmings and then close it and launch Media Center with the green button when you are done.


www.phaze1digital.com
Viewing all 108 articles
Browse latest View live


Latest Images